Sizzle Up Some Flavor with Easy Hibachi Chicken

Easy Hibachi Chicken is basically my answer to those nights when you want bold flavor, but absolutely zero fuss. Ever get stuck in that rut, where dinner feels like the eleventh hour math test you didn’t study for? Yeah, same. Well, with this, you don’t need a fancy grill or some five-star restaurant chef swagger. Got a regular skillet? Perfect! That’s all you need to whip up some magic. It’s honestly as approachable as my go-to keto chicken nuggets, or a big ol’ bowl of creamy Tuscan chicken soup (two hits in my house, by the way). Let’s dig into what makes this weeknight meal an actual, doable winner.
Easy Hibachi Chicken

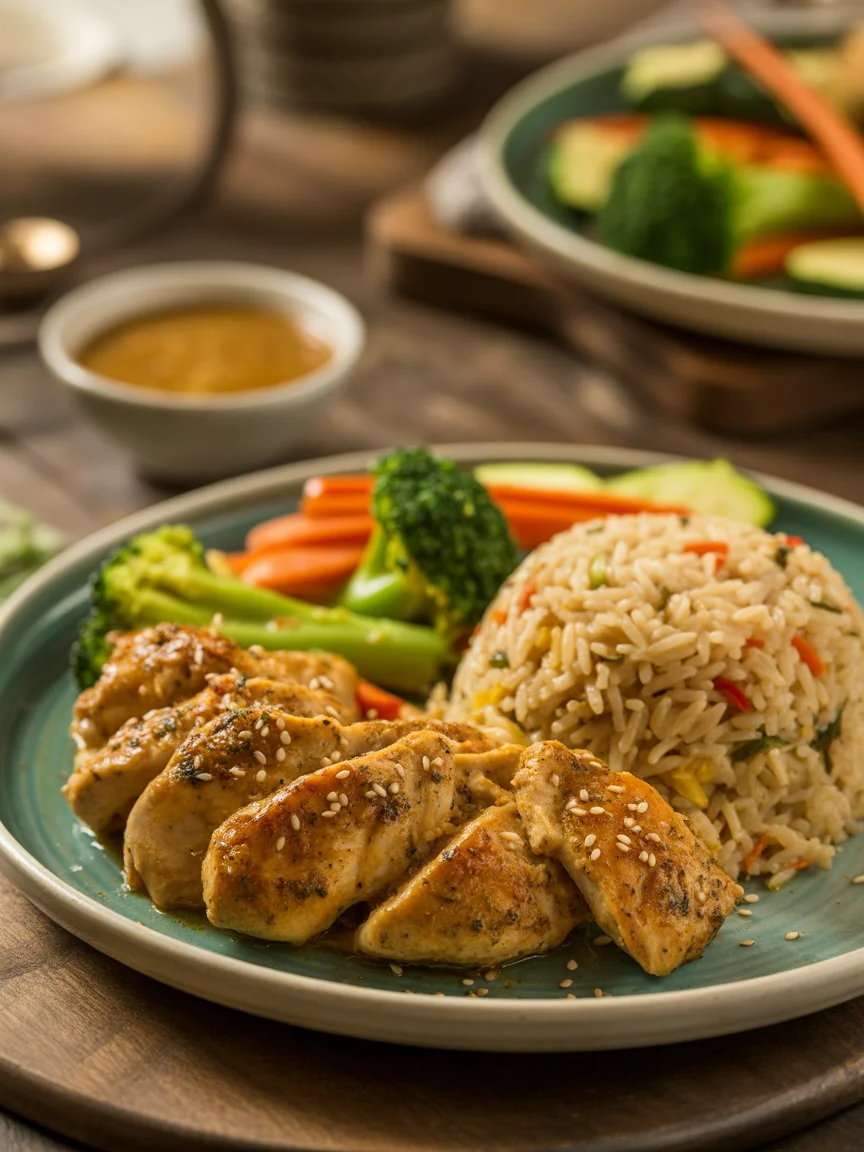
Understanding the Basics

Okay, let’s break it down. Hibachi chicken isn’t complicated, seriously. It’s all about juicy chicken, chopped up and tossed in a zippy, buttery sauce. Traditionally this happens on a flat top grill at steakhouses, where someone’s flipping shrimp into their hat (which I’ve still never seen pulled off, by the way). But at home, a regular ol’ nonstick pan is totally fine.

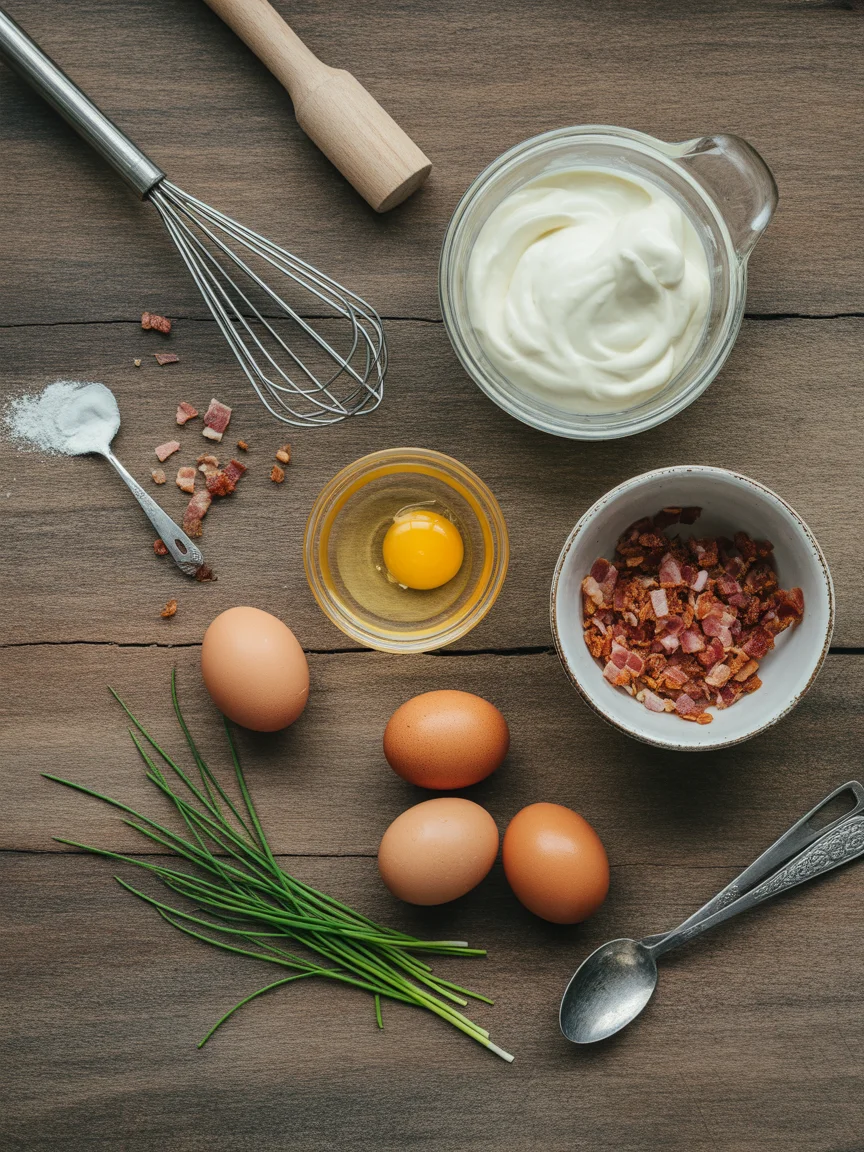
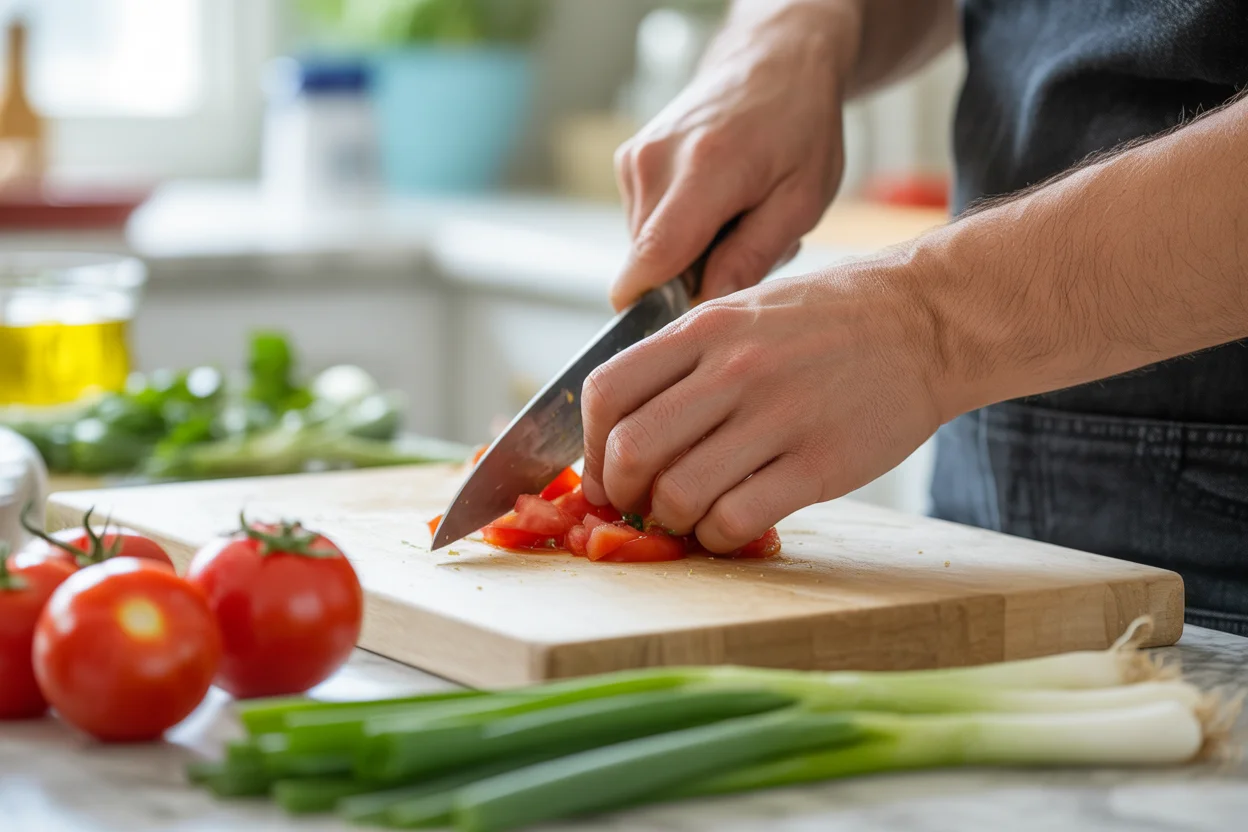
You start with chicken breast or thighs. Thighs have a bit more flavor, but honestly, go with whatever you’ve got chilling in the fridge. Just chop it into bite-size pieces. Then, the real clincher is the sauce—think soy sauce, a little garlic, butter, and a hint of sesame oil. Sometimes, I’ll toss in a teensy bit of ginger if I’m feeling wild (and if I remembered to buy it).

What I love: you don’t have to babysit this dish. Brown the chicken quickly, pour the sauce, give it a swirl, and you’re set. Want the complete flavor-punch? Serve it on some steamed veggies or cauli-rice if you’re going lower carb. So easy, I could probably do it with my eyes closed (but, you know, don’t).

Sizzle Up Some Flavor with Easy Hibachi Chicken

Common Mistakes to Avoid

Let’s be honest, I’ve botched this more than once—mostly by getting impatient or distracted (or both, to be fair). The first misstep is cramming too much chicken into the pan. Crowded pan? Hello, steamed chicken instead of crispy edges. Not my vibe.

I also used to neglect the marinade bit. Even a ten-minute soak in soy, garlic, and that touch of sesame makes a wild difference. If you skip it, the chicken can be, well, bland. No one wants bland.

Another weird mistake? Overcooking the chicken until it’s rubbery. Trust me, you don’t need dental floss for dinner. Keep a close eye and pull the chicken as soon as it’s cooked through. If you feel fancy, toss a little extra butter in at the end. That’s the secret to making it taste like it came out of a restaurant kitchen.

“I’d never tried making hibachi chicken at home until my friend shared their no-fuss version. Even I couldn’t mess it up (and my cooking skills are, hmm, questionable on a good day). Now it’s a staple for me every week.”

Easy Hibachi Chicken

Expert Tips for Success

I’m not about to claim expert status, but after about a dozen batches, I’ve picked up some shortcuts. The chicken loves a hot pan, so preheat it before anything hits the surface. You want sizzle, not a sad sizzle. Don’t rush the sauce—let it bubble and soak in, but don’t let it burn.

Here’s another thing—don’t forget those extras. Sometimes I’ll sprinkle a handful of sesame seeds or a bit of chopped green onion on top. It feels kind of fancy (even though it’s not).

If you’re tight for time, pre-chop your chicken and mix up the sauce earlier in the day. It makes actual dinnertime feel almost graceful…instead of me, frazzled in my kitchen, yelling “Where’s the garlic?!”

And if you want a slightly different spin, this concept works magic for other proteins too. I’ve swapped in shrimp, or even leftover steak, and it’s always a hit.

Real-Life Applications and Examples

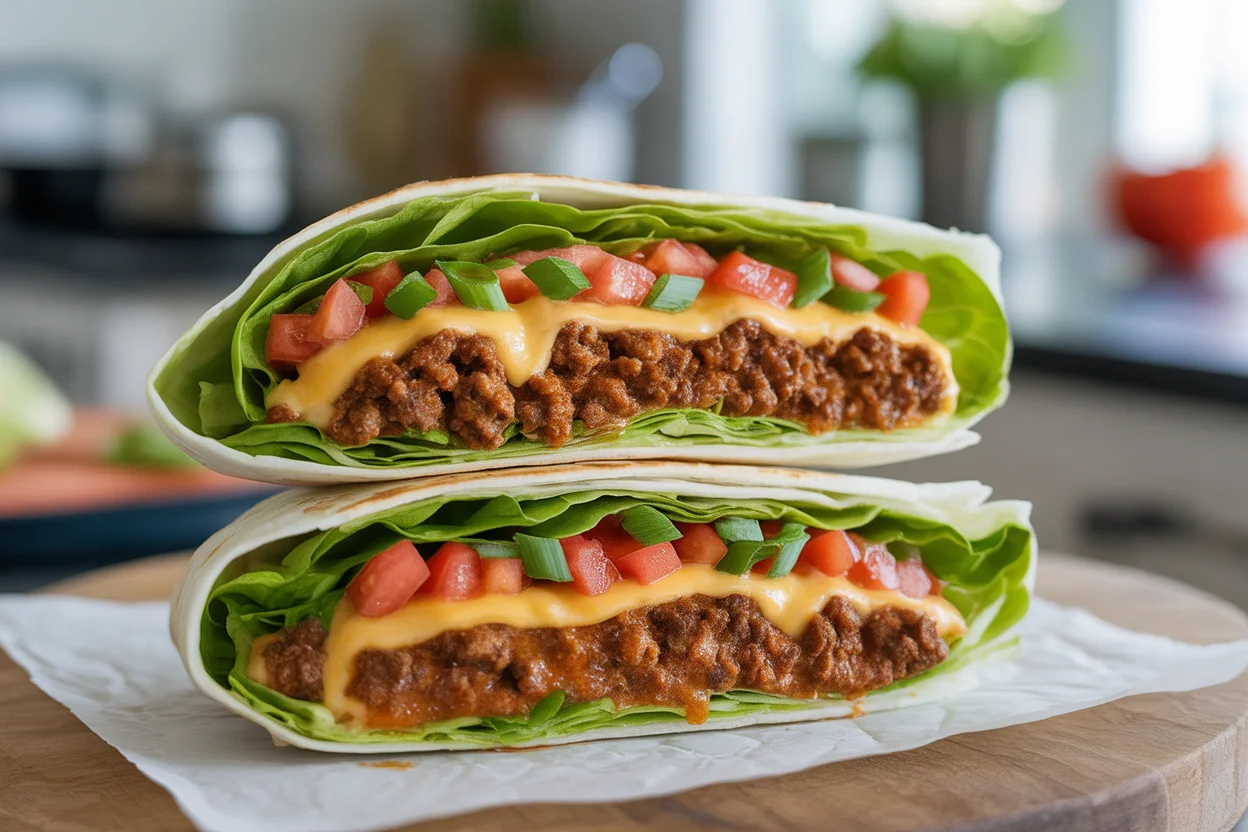
I know, recipes on paper (or, uh, screen) can feel easy. Real life? Ha. I went rogue one night and tossed my easy hibachi chicken into a wrap with shredded lettuce, and it tasted way better than those dry, limp takeout wraps. Sometimes I mix the leftovers with a batch of easy keto chicken enchilada casserole—sounds odd, but surprisingly works in a pinch for a quirky lunch.

This dish is also epic for meal prep. I just make a double batch, slap single servings into containers, and there’s my lunches sorted for a couple days. Cold or hot, it doesn’t seem to last long in my fridge (teenagers will sneak almost anything).

And hey, next time friends come by, I’ll just serve it alongside a big pot of creamy Tuscan chicken soup for that “I totally planned this meal” vibe.

Serving Suggestions

  • Sprinkle the top with green onions or sesame seeds for that little chef’s kiss moment.
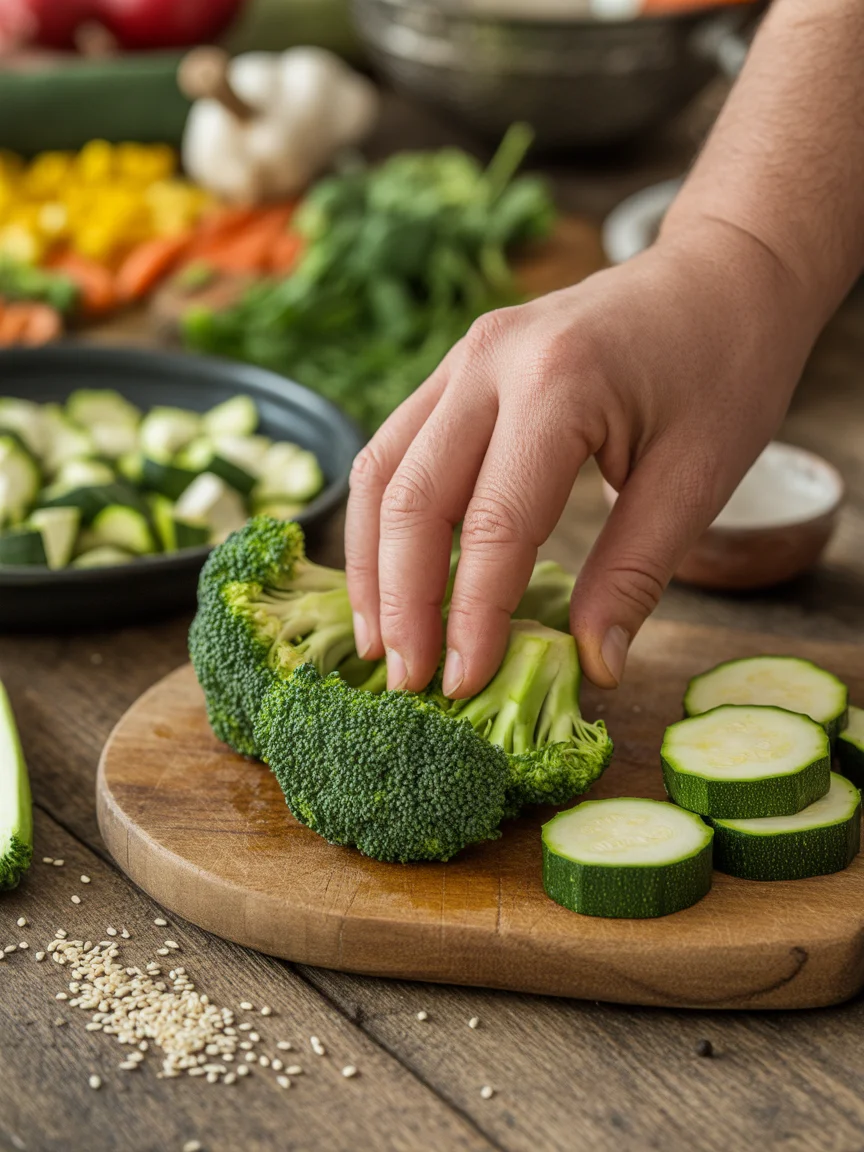
  • Pile the chicken onto steamed cauliflower rice or even leftover stir-fried veggies.
  • Serve it in lettuce wraps for more crunch and less carbs.
  • Pair it with a side of hibachi-style zucchini and onions if you’re feeling extra ambitious.

Additional Resources for Further Learning

If you’re itching to get even more into the easy hibachi chicken groove, YouTube has loads of handy clips to watch actual pros at work (I binge those all the time for inspiration). There are also some fantastic food blogs out there exploring variations—like mixing in different veggies or trying Asian-inspired sauces for extra punch.

And don’t forget to check out quick dinner ideas from other keto-friendly recipes, like these easy spins on classics or something like a punchy chicken casserole for the next busy weeknight. I find that just seeing how other folks riff on simple chicken dinners gives me stacks of ideas.

Common Questions

Q: Can I make easy hibachi chicken ahead of time?
Absolutely. Just reheat gently so the chicken stays juicy (no one wants dry).

Q: What should I do if I don’t have sesame oil?
Honestly, skip it or use a splash of olive oil. Sesame adds depth, but go with what you have.

Q: Can I use thighs instead of breast?
Go for it! Thighs have even more flavor and turn out super juicy.

Q: How spicy can I make it?
Turn up the heat! Add a squirt of sriracha or chili flakes if you want a little extra zing.

Q: What sides go best with this?
Cauliflower rice, steamed veggies, even a quick salad—it’s flexible and plays well with most things.

Wrap Up: Your Weeknight Winner

So, bottom line? There’s no reason not to try easy hibachi chicken. It nails that sweet spot between speed and flavor, no chef skills needed. If you ever get bored of your chicken rotation, this will wake your taste buds up fast. Give it a go and let yourself be surprised—you might even skip the hibachi restaurant next time. For a little more inspiration, check out these killer takes from Hibachi Chicken – The Cooking Jar or try the Easy Hibachi Chicken – The Salty Marshmallow version. Each has its own twist I love. Now, what’s stopping you? Chicken’s waiting. Grab a pan and let’s get cooking!

Easy Hibachi Chicken

A quick and flavorful hibachi chicken recipe made in a skillet, perfect for weeknight dinners and meal prep.
Prep Time 10 minutes
Cook Time 15 minutes
Total Time 25 minutes
Course Dinner, Main Course
Cuisine Asian, Japanese
Servings 4 servings
Calories 300 kcal

Ingredients
  

Main Ingredients

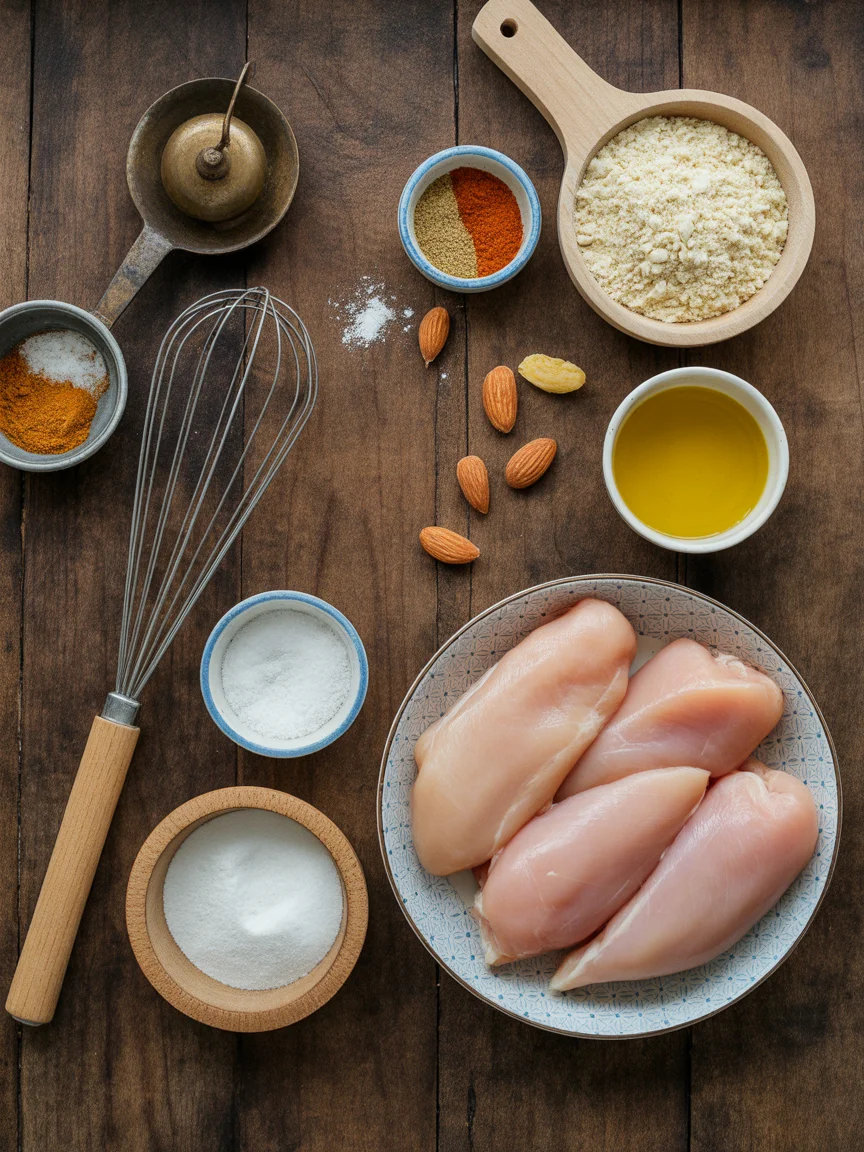
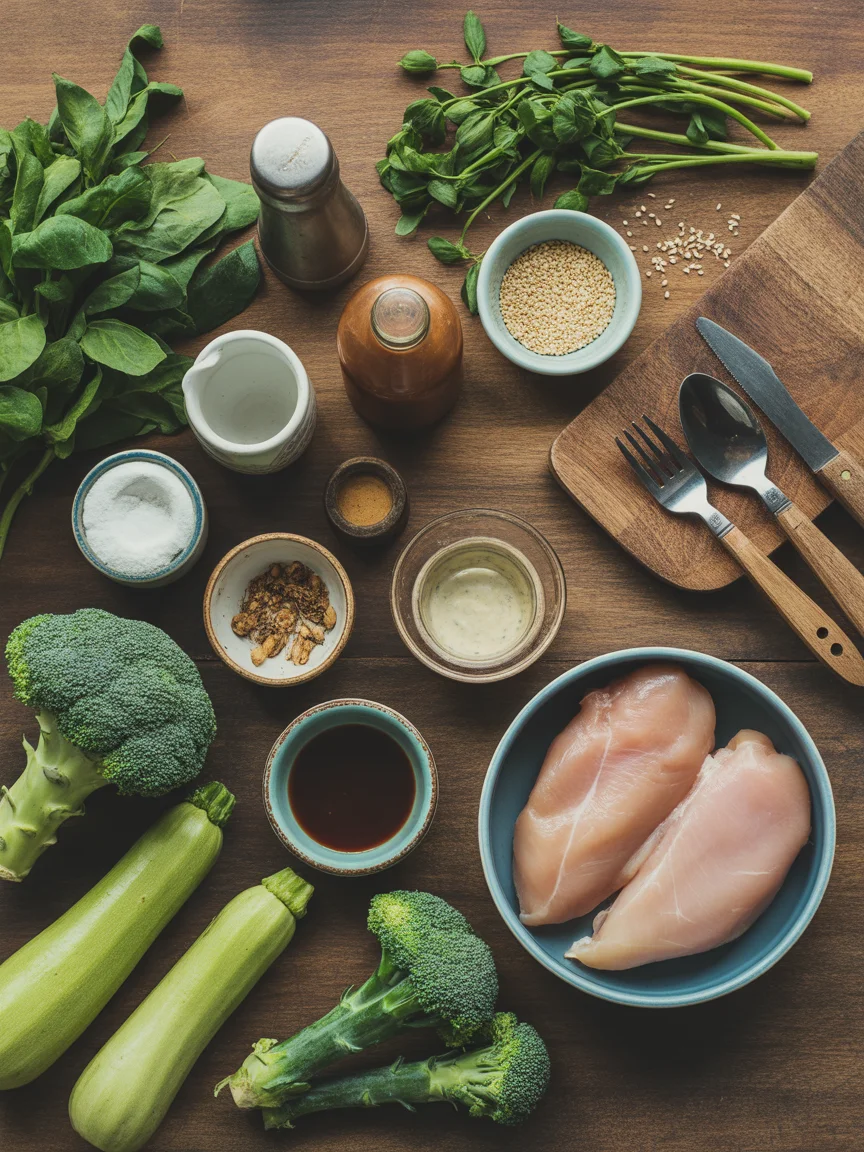
  • 1 pound chicken breast or thighs, chopped Thighs provide more flavor.
  • 2 tablespoons soy sauce For marinade and sauce.
  • 2 tablespoons butter For cooking and adding flavor.
  • 1 clove garlic, minced Enhances flavor.
  • 1 teaspoon sesame oil Optional for depth of flavor.
  • 1 teaspoon ginger, minced Optional for extra flavor.

Serving Suggestions

  • 2 cups steamed cauliflower rice For a low-carb option.
  • 1 cup steamed vegetables Pairs well with the dish.
  • 1 cup green onions, chopped For garnish.
  • 2 tablespoons sesame seeds Optional garnish.

Instructions
 

Cooking

  • Preheat a nonstick skillet over medium-high heat.
  • Add chicken pieces to the hot skillet, ensuring not to overcrowd the pan.
  • Cook the chicken for 5-7 minutes, or until browned and cooked through.
  • In a small bowl, mix soy sauce, butter, minced garlic, and sesame oil.
  • Pour the sauce over the cooked chicken and stir to coat.
  • Let the sauce bubble for a minute, being careful not to burn it.
  • Remove from heat and serve immediately.

Notes

For best results, let the chicken marinate in soy sauce and garlic for at least 10 minutes before cooking. Serve with fresh veggies or in lettuce wraps for a low-carb option.
Keyword Easy Chicken Recipe, Hibachi Chicken, Keto Friendly, Quick Dinner, Weeknight Meal

Easy & Delicious Scrambled Pancakes Recipe for Sunny Mornings

Ever looked at a pancake recipe and thought, okay, I love pancakes… but I don’t have time for all that flipping and swirling first thing in the morning? Scrambled Pancakes Recipe is perfect for mornings like that. I’ve definitely gotten halfway into regular pancakes and thought, why am I stressing? Scrambled pancakes are way easier, sort of like the breakfast world’s hidden gem. If you’re a fan of tasty shortcuts (me too), or you just want something fun for a change, keep reading. And hey, if you’re looking for more relaxed recipes, check out my favorite creamy spaghetti squash Alfredo or this easy chicken enchilada bake – both save me time like you would not believe.
Easy & Delicious Scrambled Pancakes Recipe for Sunny Mornings

What are Scrambled Pancakes

Scrambled pancakes are, honestly, as humble as breakfast gets. Think fluffy pancake bites, jumbled and golden, almost like deconstructed pancakes. There’s no endless waiting while you cook one pancake after another. Just pour your batter in the pan, then, here’s the fun bit, scramble it up as it cooks. It looks rustic, weird, and kinda adorable.

Here’s the real deal: scrambled pancakes taste just like classic pancakes, except the edges are a bit crispy and every bite is different. That’s the magic for me. My kids actually think I invented them (spoiler: I totally didn’t – but I’m not telling). Grab a fork, top it off with syrup, and you’ll never look at old-school pancakes the same way. You can even play around with the batter, or toss in bits of fruit and chocolate chips for a personal twist. A full-on breakfast win, honestly.

Scrambled Pancakes Recipe

How to Make Scrambled Pancakes

Alright, so here’s the “oh wow, this is easy” part. To make scrambled pancakes, you whip up pancake batter just like you always do. Use your favorite mix or try homemade, I’m not picky (sometimes I even throw in a scoop of protein powder because why not?).

Heat a good-sized nonstick skillet over medium. Melt a pat of butter – it’ll smell heavenly, trust me. Once your pan’s hot, pour in the batter. You don’t wait. The moment little bubbles show up at the edges, grab your spatula and start scrambling it up. The goal is raggedy pieces, some a bit golden, some paler, all fabulous. Keep gently moving it around so none of it burns. In five minutes or so, you get a big plate of scrambled pancake wonders. Dish up while it’s still warm.

Honestly, every now and then a batch turns out a bit lumpy or extra crispy. Never disappointed though. Feels like it’s meant to be imperfect.

“I was skeptical, but scrambled pancakes are my new weekend treat. So simple, and my family cleaned their plates! Will not go back to the old way!” – Jenna L.

Scrambled Pancakes Recipe

Scrambled Pancake Ingredients

You don’t really need anything fancy for scrambled pancakes. Here’s my basic go-to:

  • 1 cup all-purpose flour (or swap for your favorite blend)
  • 2 tablespoons sugar (eh, plus or minus, taste buds differ)
  • 2 teaspoons baking powder
  • 1 pinch of salt
  • 1 egg
  • 1 cup milk (sometimes a splash more)
  • 2 tablespoons melted butter (plus more for the pan)
  • Optional: vanilla, chocolate chips, berries, nuts – or a combo, go wild

If you’re all about easy, yes, you can use a store-bought pancake mix. Won’t tell anyone. Oh, and if you want to make it more filling, a scoop of protein powder or some Greek yogurt blended right in never hurt.

Tips and Tricks for Scrambled Pancakes

Alright, let’s cut the nonsense – scrambled pancakes don’t need to be complicated, but a couple of tips make all the difference. For starters, don’t overmix your batter. Some lumps? Totally fine (even good, actually). Next up, let your pan get hot before the batter goes in, but not smoking hot. If the butter browns too fast, just take it off the heat for a sec.

If you want fluffy bites, resist stirring non-stop. Just scramble every few seconds, so some pieces get those pretty golden edges. And if you like crispy bits (who doesn’t, really?), leave a few pieces to brown a little longer. Got leftovers? Toss them in the toaster the next day – life hack. Scrambled pancakes also love toppings, so let everyone in the family throw on whatever they please.

Honestly, the best part is you can make a massive pile for hungry guests in no time. Try adding different flavors to the batter or simply switching toppings for a big breakfast adventure. (And if you’re trying to keep things keto, my easy keto salmon recipe is total magic for dinner.)

What to Put on Top of Scrambled Pancakes

For toppings, you can keep things classic or go wild. Here are some of my family’s top picks:

  • Warm maple syrup (can’t go wrong)
  • Dollop of whipped cream or yogurt
  • Berries – strawberries, blueberries, raspberries – whatever’s on sale
  • Shaved chocolate, nuts, or even a swipe of peanut butter

Confession time: I once topped mine with caramel sauce and sea salt, just because. Zero regrets, only sticky fingers. Get creative – you do you!

Common Questions

Q: Do these actually taste like pancakes?
A: Yep! They’re just scrambled into bite-sized bits. Same flavor, less fuss.

Q: Can I use pancake mix?
A: Absolutely, saves time and tastes great.

Q: How do you store leftovers?
A: Pop them in an airtight container in the fridge. Reheat in a toaster oven or skillet for the best texture.

Q: Is this good for big groups?
A: Honestly, it’s perfect. Way faster than traditional pancakes, and you can make a mountain for everyone without flipping for hours.

Q: Can I make it dairy-free or gluten-free?
A: Of course – just sub your favorite milk or gluten-free flour. Works like a charm.

Give This Breakfast Wonder a Spin!

Seriously, if you’ve made it this far, scrambled pancakes might be calling your name. It’s the only breakfast I crave on those crazy, sunny mornings – the ultimate mix of comfort and speed. If you’re into discovering new food ideas, I highly recommend checking out these scrambled pancakes recipe made easy guides and also seeing how creative folks get over on TikTok scrambled pancakes. But honestly, you can just grab what you have in your pantry and give these a shot tomorrow. No standing over the stove for ages, promised! Happy breakfasting!

Scrambled Pancakes

Scrambled pancakes are a simple and fun breakfast twist that combines the flavors of traditional pancakes without the need for flipping. They are fluffy, jumbled bites that can be customized with various add-ins and toppings.
Prep Time 10 minutes
Cook Time 5 minutes
Total Time 15 minutes
Course Breakfast, Brunch
Cuisine American
Servings 4 servings
Calories 220 kcal

Ingredients
  

Main Ingredients

  • 1 cup all-purpose flour Can swap for your favorite blend
  • 2 tablespoons sugar Adjust based on taste
  • 2 teaspoons baking powder
  • 1 pinch salt
  • 1 large egg
  • 1 cup milk Add a splash more if needed
  • 2 tablespoons melted butter Plus more for the pan

Optional Add-ins

  • vanilla For flavor enhancement
  • chocolate chips Can be mixed into the batter
  • berries Strawberries, blueberries, or others
  • nuts Optional for added crunch

Instructions
 

Preparation

  • Whip up pancake batter using your favorite mix or homemade recipe.
  • Heat a nonstick skillet over medium heat and melt a pat of butter.

Cooking

  • Pour in the batter into the skillet without waiting.
  • When little bubbles form at the edges, grab a spatula and start scrambling the batter.
  • Scramble until you achieve raggedy pieces, some golden and some paler, in about 5 minutes.
  • Dish up while warm.

Notes

Don't overmix the batter. Allow the pan to get hot before adding the batter. For crispy edges, let some pieces brown a little longer. Leftovers can be reheated in a toaster.
Keyword Breakfast Recipes, Easy Pancakes, Pancake Recipe, Quick Breakfast, Scrambled Pancakes

Delicious Keto Egg Salad That’s Super Easy to Make!

keto egg salad just saves me every time lunch rolls around and I realize (oops) I forgot to plan something decent. Listen, that awkward rumbling belly feeling? Been there. With only a handful of ingredients, this keto egg salad swoops in, creamy and tangy, ready in ten minutes flat. Not kidding – it’s so tasty you’ll want to eat it straight from the bowl, but it also pairs up with nearly anything. If you love throw-together meals like keto eggplant parmesan or need a side like air fryer spaghetti squash, keep reading, because this one is a winner for picnics, meal prep, and those “what do I grab quick?” moments.
keto egg salad

How to Make Low-Carb, Keto, & Whole30 Egg Salad

First up: boil some eggs (don’t freak, there’s nothing to it). I usually do about six at a time for the week, but you can scale up if you’ve got a crowd. Cool ‘em, peel ‘em, chop ‘em – haphazard chunks are fine. Plop the eggs in a bowl. Next, spoon in a big dollop of mayo (I always say, use the good stuff). Add a pinch of salt, cracked black pepper, and a dot of Dijon mustard. If you’re anything like my cousin Sarah, who cannot resist a bit of crunch, toss in chopped celery or, hey, sliced green onions. Mix gently with a fork – not until it’s mush but still a bit chunky.

I figured out once (by accidental experiment) that a splash of lemon juice wakes up all the flavors. You could even add a sprinkle of smoked paprika, but that’s between us. It’s your egg salad now – play with it.

I’ve tried making egg salad with Greek yogurt or avocado, but this classic combo hits every craving without making me feel like I’m missing out.

Delicious Keto Egg Salad That's Super Easy to Make!

Ways to Serve & Enjoy this Keto & Whole30 Egg Salad

This keto egg salad? Adaptable is an understatement. I’ve grabbed a fork and eaten it solo, but you might want something a smidge fancier:

  • Pile it high in lettuce wraps for crunch and not a single carb.
  • Slap it between slices of keto bread (yup, a sandwich approved for keto!).
  • Spoon over cucumber rounds when you’re feeling snacky.
  • Toss onto a mixed greens salad with a little extra olive oil drizzle and maybe a pickled jalapeño.

And don’t sleep on stuffing it into halved avocado. So good, so filling.

keto egg salad

Tips for Meal Prepping and Storing Egg Salad

If you love meal prepping like I do, this salad will change your game. I honestly make a big batch on Sunday, pop it in a glass container, and scoop out servings all week. The mayo keeps things creamy even four days later (sometimes I stir in just a splash more by day three, if it looks a bit dry). Don’t freeze it though – trust me, weird things happen.

Leaving the salad in an airtight container stops those eggy smells from taking over your entire fridge (we don’t need that drama). If you want to pack lunches ahead—store toppings and greens separate, mix fresh when you’re ready to eat. Little things, big payoff.

Keto Egg Salad Variations to Try

Got bored tastebuds? I hear you. Turn up the flavor by switching up your mix-ins. Sometimes I’ll do chopped dill pickles instead of celery for a briny kick. If I’m feeling extra, a couple slices of crispy bacon get crumbled right in. My best friend once dumped leftover rotisserie chicken in her bowl, and—wait for it—it was a five-star restaurant lunch in her own office. You can also try diced avocado or mix in a bit of sriracha if you’re the spicy type.

So play around. Sometimes a sprinkle of fresh parsley or even chives makes it feel totally new. One week, it’s herby. Next week, smoky. Don’t overthink it, just have fun.

Nutritional Benefits of Keto Egg Salad

Besides winning the “most-likely-to-be-requested” at my family parties, keto egg salad is actually a wellness rockstar. Eggs—yeah, they give you protein for days. Plus plenty of healthy fats, so you stay full and avoid that dreadful 3 p.m. snack attack. No sugar buzz, no crash. Just real food, none of those iffy additives. If you’re following keto or Whole30, you already know this means no grain fillers to ruin your fun.

Bonus: packed with vitamin D and a sneaky dose of choline for your brain. To be honest, my energy is better all afternoon when I eat this instead of my old-school sandwich lunch.


Common Questions

Q: Can I use store-bought mayo?
A: Absolutely, but look for one without added sugars or weird oils if you want full keto vibes.

Q: How long can you keep keto egg salad in the fridge?
A: Four days easy, maybe five if your eggs were super fresh to start.

Q: Can I use Greek yogurt instead of mayo?
A: You can swap, but flavor changes a bit. It won’t be quite as creamy (I’ve tried it!).

Q: What can I use instead of celery?
A: Pickles, green onions, or even a handful of chopped fresh herbs. Totally up to what you like.

Q: Any creative ways to serve it for guests?
A: Stuff it into mini bell peppers or little endive leaves. Look at you, all fancy!


Ready to Change Up Your Keto Lunch Game?

If you’re tired of the same bland salads or mystery “low-carb” meals, honestly—give this keto egg salad a go. It’s satisfying, packs serious flavor, and lets you switch up ingredients if you feel adventurous. For even more ideas, check out this Keto Egg Salad Recipe – Whole30 Egg Salad – What Great Grandma Ate if you want another spin on it, or see what happens with a bit of seasoning in this Easy Keto Egg Salad variation.

Seriously. You’ll be craving it every week (and yes, maybe showing it off with air fryer spaghetti squash or a side of keto eggplant parmesan). Fast. Flavorful. No fuss. Promise you’ll wish you made it sooner.

Keto Egg Salad

A creamy and tangy egg salad that's perfect for low-carb, keto, and Whole30 diets, made with just a handful of ingredients and ready in ten minutes.
Prep Time 10 minutes
Cook Time 10 minutes
Total Time 20 minutes
Course Lunch, Snack
Cuisine American
Servings 4 servings
Calories 300 kcal

Ingredients
  

Main Ingredients

  • 6 large eggs 6 large eggs Boiled, cooled, and chopped.
  • ½ cup mayonnaise Use high-quality mayo.
  • 1 pinch salt
  • 1 pinch cracked black pepper
  • 1 teaspoon Dijon mustard

Optional Add-Ins

  • ¼ cup chopped celery For additional crunch.
  • 2 tablespoons sliced green onions For added flavor.
  • 1 splash lemon juice To enhance flavors.
  • 1 teaspoon smoked paprika For extra flavor (optional).

Instructions
 

Preparation

  • Boil the eggs in water until fully cooked, about 10 minutes. Allow to cool.
  • Peel the shells off the eggs and chop into haphazard chunks.
  • In a bowl, combine chopped eggs, mayonnaise, salt, pepper, and Dijon mustard.
  • If using, add chopped celery, green onions, lemon juice, and smoked paprika. Mix gently with a fork until well combined.

Notes

Store in an airtight container in the fridge for up to 4 days. For meal prepping, keep toppings and greens separate until ready to serve. Freezing is not recommended.
Keyword Egg Salad Variations, Keto Egg Salad, Low-Carb Salad, Meal Prep, Whole30 Recipe

Crispy Keto Chicken Nuggets You’ll Love in Minutes!

Keto chicken nuggets are a total game changer, right? I can’t count how many times I’ve craved drive-thru nuggets and just sat there staring at the menu, knowing I shouldn’t. If you’ve ever eyed those crispy little bites but worried about low-carb goals, you’re not alone. Trust me, you CAN have your favorite comfort food the keto way. I found a recipe at Simply Keto Recipes that honestly fixed all my nugget cravings in one go, and now, well, I make them way too often. Check out this keto chicken nuggets recipe if you’re impatient like me and want the shortcut.

keto chicken nuggets

Why You’ll Love This Recipe

So why am I actually obsessed with these keto chicken nuggets? Let me count the ways, or at least try. First, they taste absolutely incredible. Not even joking, these are crunchy on the outside and juicy inside, just like the fast food spots. I never miss the drive-thru now, that’s for sure.

Second, these are FAST. I’m talking minimal ingredients you likely already have stashed in your kitchen. That’s something I love — no weird flours or eleven kinds of cheese. It’s all straightforward.

And here’s my opinion, probably controversial: homemade nuggets are way more fun. You can play around, snack while you cook, even let the kids help with the coating part (mine always want to, though it gets messy, fair warning). Plus, you’ll feel a little like a five-star chef with zero stress.

Honestly, after you do these once, you’ll get why I’m saying they fix your nugget cravings and keep it keto. Seriously.

“Thought I’d never find a decent keto nugget that made the whole family happy. These did. Haven’t looked back since.” – Jamie L.

keto chicken nuggets

Top Tips

Alright, don’t make the rookie mistakes I did at the start. Here’s how to get your keto chicken nuggets crispy and tasty every single time. The biggest tip? Use bite-size chunks of chicken breast or thigh. Basically, stay away from giant pieces. They cook unevenly, which, trust me, isn’t what you want.

For the coating, almond flour is usually my go-to, but sometimes a bit of crushed pork rind (yep, pork rinds) gives you this extra-level crunch. Season it up! Garlic powder, a little paprika, salt, and pepper. Don’t skimp or the nuggets can taste kind of bland and… blah.

When frying, get the oil hot enough before dropping in your nuggets. Too cool, and they soak up oil like a sponge — too hot, and you’ll burn the outside. I usually test it with a little piece of the coating first. Don’t crowd the pan because then you’ll get soggy results, and no one wants that disappointment.

Final tip? Serve immediately! These keto chicken nuggets have the most satisfying crunch straight off the stove or out of the oven. Get some good dipping sauce ready (more on that soon).

Crispy Keto Chicken Nuggets You’ll Love in Minutes!

Variations

Bored with plain? Me too, sometimes. The awesome thing about keto chicken nuggets is you can switch things up so easily. Swapping out spices changes the whole vibe. If you love heat, a bit of cayenne or buffalo sauce in the egg wash does wild things (in a good way). Sometimes I’ll mix in grated parmesan with the almond flour — makes each bite cheesy and next-level. Want another twist? Dip in sugar-free BBQ before the coating for a tangy crust.

If you’re dairy-free, just skip the cheese. Not kidding, these still hold together and taste great. I’ve even tried a coconut flour variation which was (to be honest) a bit sweeter, but not bad at all. Oh, and kids really love the mini versions. Tiny nuggets, big fun. For other keto chicken ideas with different flavors, check out amazing recipes like easy keto chicken enchilada casserole.

Serving Suggestions and Dipping Sauces for Keto Chicken Nuggets

Okay, let’s get into the good stuff. Here’s how I usually serve my keto chicken nuggets so the whole bunch (even picky eaters) get excited:

  • Classic ranch or blue cheese – you can’t beat creamy dips with that crispy nugget crunch.
  • Sugar-free ketchup (or spicy mayo) – not gonna lie, tastes practically like the “real thing.”
  • With a fresh green salad – make your meal look five-star and get some veggies in, too.
  • Paired with keto chicken tortilla soup if you’re extra hungry, try keto chicken tortilla soup.

Sometimes I pile the nuggets on a platter with a bunch of different sauces, let everyone go to town. Makes weeknight dinners feel special.

Storage

Honestly, these keto chicken nuggets are best fresh, but leftover? Still tasty. After you finish the meal, just pop any extras in an airtight container and stick them in the fridge. They usually keep three days or so (if they last that long!). If you want to re-crisp, throw them into an air fryer or hot oven for a few minutes. The microwave is super convenient but, heads up, will make them a little softer.

If you’re the planning type, you can freeze uncooked coated nuggets on a tray, then transfer them to a bag. Pull out what you need for easy last-minute meals. Not that I ever plan that far, but hey, maybe you’re more organized than me.

Common Questions

Can I bake these instead of frying?
Definitely. Bake at around 400°F until crispy, turning halfway so every side gets a bit of crunch.

What’s the best oil to use for frying?
I love avocado oil. It holds up to high heat and doesn’t leave a weird aftertaste.

Can I use chicken thigh instead of breast?
Sure thing! Thighs come out juicier and are sometimes cheaper, too.

Do these taste like traditional nuggets?
Honestly, yes. They scratch that fried chicken itch with none of the guilt.

Are these nuggets gluten free?
Yep, absolutely. As long as your ingredients are keto-safe and gluten free, you’re good to go.

Ready to Snack Like a Pro

So! That’s the rundown on my favorite crispy keto chicken nuggets, the ones that keep me from raiding the kid’s fast food leftovers. If you get creative with your seasonings and try tricks like pork rinds, you’ll never get bored. Don’t forget there are even more ideas over at Low Carb Chicken Nuggets – Hungry Happens and another take from Keto Chicken Nuggets – Grumpy’s Honeybunch. You can also peep Easy Keto Chicken Nuggets – Beauty and the Foodie for more inspiration. Seriously, just try these nuggets tonight and see if you’re not completely hooked by tomorrow. Happy crunching!

Keto Chicken Nuggets

Delicious and crispy keto chicken nuggets that satisfy your cravings without the carbs.
Prep Time 10 minutes
Cook Time 10 minutes
Total Time 20 minutes
Course Appetizer, Snack
Cuisine American, Keto
Servings 4 servings
Calories 320 kcal

Ingredients
  

For the chicken nuggets

  • 1 lb chicken breast or thigh Cut into bite-size chunks.
  • 1 cup almond flour For coating.
  • 1 large egg For the egg wash.
  • 1 tsp garlic powder For seasoning.
  • 1 tsp paprika For seasoning.
  • to taste salt and pepper To season the nuggets.
  • oil for frying avocado oil or preferred oil For frying.

Instructions
 

Preparation

  • Cut the chicken into bite-size chunks and set aside.
  • In a bowl, mix almond flour, garlic powder, paprika, salt, and pepper.
  • In another bowl, whisk the egg.

Cooking

  • Dip chicken pieces into the egg and then coat with the almond flour mixture.
  • Heat oil in a frying pan until hot.
  • Fry the chicken nuggets in batches, being careful not to overcrowd the pan.
  • Cook until golden brown and cooked through, about 5 minutes each side.
  • Serve immediately with your favorite dipping sauce.

Notes

For best results, serve hot and consider dipping sauces like ranch dressing or sugar-free ketchup. You can also freeze uncooked nuggets for later use.
Keyword Comfort Food, Crispy Chicken, Healthy Snacks, Keto Chicken Nuggets, Low Carb Nuggets

Delicious Keto Crunchwrap You Can Whip Up at Home!

Keto Crunchwrap cravings hit differently, right? You want something crispy, gooey, and savory, all while keeping the carbs in check. I totally get the struggle. Taco night used to leave me feeling left out, watching everyone else wolfing down wraps while I poked at lettuce. Hang tight, because this recipe is about to fix your problem. Oh, and if you’re a side dish fanatic, you’ve gotta check out these air fryer spaghetti squash ideas or maybe even try a hearty beef heart stew keto recipe for next week.
Delicious Keto Crunchwrap You Can Whip Up at Home!

Low Carb Crunchwrap Supreme Video Tutorial

Some folks like to read, others (like me) love to see the process. Grab your apron, prop up your phone, and let the step-by-step video play along. You’ll catch every flip, fold, and sizzle. I might mumble, drop a spatula, or forget the cheese for a minute (totally happens). But you’ll see just how doable this Keto Crunchwrap really is—even if your kitchen’s a bit chaotic. Visuals help a ton, trust me. My first one came out shaped like a sad pentagon but tasted like victory.

People constantly message me saying, “Oh my word, my Crunchwrap came out just right!” So, if you’ve ever feared keto recipes are complicated, this video’ll change your mind. Real talk: melted cheese waits for no one.
Delicious Keto Crunchwrap You Can Whip Up at Home!

Healthy Crunchwrap Ingredient Swaps

Let’s keep it real: the biggest barrier to making a Keto Crunchwrap at home? That regular tortilla situation. You need something cozy for those fillings—but without a carb disaster.

Here’s my kitchen-tested fix. Grab a low carb tortilla from the store (those big burrito-sized ones work). If you want full control, make almond flour wraps or even use cheese wraps (yes, those stretchy wonders made from straight cheese—nothing against a little cheese madness).

Ditch the usual refried beans, swap in a spread of well-seasoned cauliflower mash. Not lying, I was skeptical, but it works. I pile in browned ground beef or shredded chicken (leftover rotisserie is your friend), whatever you’ve got lurking. Add a scoop of guac for happy fats and, naturally, don’t skip the cheese.

Do I ever go wild with fillings? Oh, you bet. Bell peppers, chopped jalapeños, even a couple of leftover crispy low carb hash browns right in there—seriously, try it once!

As for the crunch? Pork rinds, my friend. Almost magical. Snap them up and layer inside before folding for that snap!
Keto Crunchwrap

How to Make a Crunchwrap: Cooking Tips

Let’s talk actual kitchen moments. This Keto Crunchwrap isn’t hard to make at all. But, keep your cool, because the first fold is always the trickiest.

Lay down your low carb tortilla. Pile the meat in the center, right? Now, cheese next, your veggie bits, sour cream if you want (careful, not too close to the edge—it sneaks out and burns). Pork rinds on top for crunch! Tuck the edges gently over everything, working in a circle (not kidding, this is origami for hungry folks). If you don’t have a perfect fold, who cares? Tastes the same.

Here’s where folks mess up: too much filling equals poor closure. Go lighter. Flip your precious parcel onto a medium-hot skillet, seam-side down. Smash it a bit with a spatula. Wait for the golden brown magic—probably a minute or three. Flip and toast the other side. That’s it! If it falls apart, laugh it off and eat it anyway.

Give it a minute before slicing in, or you’ll get the “molten cheese flood” (I speak from experience).

This is my go-to keto lunch for work. Even my non-keto husband asks for these on Taco Tuesday! The pork rinds are a game-changer for crunch.

Recipe Variations

This Keto Crunchwrap is begging for tweaks. You get bored easily? I do. No shame in it.

Switch the protein—think spicy chorizo, even pulled pork from last Sunday’s dinner. For breakfast, you can go full-on brunch mode with scrambled eggs and bacon (check out more ideas on my breakfast keto page). Sometimes I skip beef and pack it with spicy shredded chicken, peppers, and a dollop of avocado cream.

Vegetarians, hey, don’t leave yet! Sautéed mushrooms, spinach, and a lake of melty cheese is unreal. For a tang, throw in pickled jalapeños. Want more of a Tex-Mex hit? Try some smoked paprika in the fillings.

And if you want to make dinner a cinch, pair your Keto Crunchwrap with a creamy spaghetti squash alfredo recipe for a real comfort night. You’ll thank me later.

How Many Carbs Are in a Crunchwrap Supreme

This is the sticky part, right? The classic fast food version can smash 50+ grams of carbs—ouch, no thanks. By hacking your Keto Crunchwrap at home, you’ll probably land closer to 7-10 grams of net carbs per wrap (depends on the tortilla and fillings, so check your labels and do quick math).

Pair it with a light side (maybe a salad or a soup from my soup keto collection) if you’re counting. The real trick: use the lowest net carb tortilla you can hunt down. Or better yet, make your own.

Don’t sweat the numbers too much for a one-off treat, though. One wrap, loaded smartly, will hardly nudge most daily macro goals.

Serving Suggestions

Okay, now for the fun—how to eat it and not look like a total dork while dipping.

  • Slice it in half for that classic fast food reveal photo (Instagram, anyone?).
  • Dunk in salsa, homemade ranch, or spicy guac—go nuts with the dips.
  • Add a crisp salad on the side, or go wild with spicy cauliflower rice.
  • Eat it at lunch, dinner, or sneak it for a midnight snack. No judgments.

Common Questions

Q: Will this crunch up like the real thing?
A: Yes! If you pan-sear it hot (and don’t overfill), you get a proper crunch thanks to the pork rinds.

Q: Can I freeze a Keto Crunchwrap?
A: Freeze wrapped in foil. Reheat in the oven or air fryer. Doesn’t get soggy, I swear!

Q: Do I need special tortillas?
A: Low carb or homemade almond flour ones work. Cheese wraps are unique but messier to fold.

Q: What sauce works best inside?
A: Salsa, sour cream, or even a little chipotle mayo bring it to life. Careful with watery salsas though.

Q: My wrap falls apart! What’s up?
A: Too much filling or weak tortilla. Go lighter on fillings, heat your tortilla first to help with folding.

Ready, Set, Crunch!

Honestly, this Keto Crunchwrap made me love taco night again. You can tweak it, make it your own, and not stress over carbs. Next time you want something actually fun and tasty, give this one a try. And if you want more ideas, there are awesome guides out there like the Low Carb Crunchwrap Supreme (Legit + Easy!) or this killer Low Carb Keto Crunchwrap Supreme that might help, too. Let yourself experiment, laugh at the flops, and trust me: you don’t need Taco Bell when you can make crunchwraps at home that taste like five-star comfort.

Keto Crunchwrap Supreme

A delicious low-carb version of the classic Crunchwrap Supreme, loaded with savory fillings and a satisfying crunch, perfect for a keto-friendly meal.
Prep Time 15 minutes
Cook Time 10 minutes
Total Time 25 minutes
Course Dinner, Lunch
Cuisine Keto, Mexican
Servings 2 servings
Calories 400 kcal

Ingredients
  

Wrap Ingredients

  • 2 pieces Low carb tortillas Big burrito-sized tortillas work best.

Filling Ingredients

  • 1 cup Browned ground beef or shredded chicken You can use leftover rotisserie chicken.
  • 1 cup Cauliflower mash Used as a replacement for refried beans.
  • 1 cup Shredded cheese Use your choice of cheese.
  • ½ cup Diced bell peppers Add your choice of veggies.
  • ¼ cup Chopped jalapeños Optional for added heat.
  • ¼ cup Sour cream Optional, add carefully to avoid spillage.
  • ½ cup Pork rinds For added crunch.
  • 1 tablespoon Guacamole For healthy fats.

Instructions
 

Preparation

  • Lay down one low carb tortilla on a flat surface.
  • In the center of the tortilla, pile the browned ground beef or shredded chicken.
  • Add shredded cheese on top of the meat.
  • Layer the diced bell peppers, jalapeños, sour cream, and guacamole on top of the cheese.
  • Sprinkle pork rinds on top for extra crunch.
  • Gently tuck the edges of the tortilla over the fillings, working in a circular motion to form a wrap.

Cooking

  • Heat a skillet on medium heat.
  • Carefully place the crunchwrap seam-side down in the skillet.
  • Press down slightly with a spatula and cook until golden brown, approximately 1-3 minutes.
  • Flip the crunchwrap and toast the other side until golden.
  • Remove from skillet, allow to cool slightly before cutting into halves.

Notes

This recipe allows for plenty of customization; feel free to switch proteins or add more vegetables. For a breakfast version, try scrambled eggs and bacon.
Keyword Crunchwrap Supreme, Healthy Eating, Keto Crunchwrap, Keto Recipes, Low Carb