Delicious Low Carb Coleslaw You’ll Love Making at Home

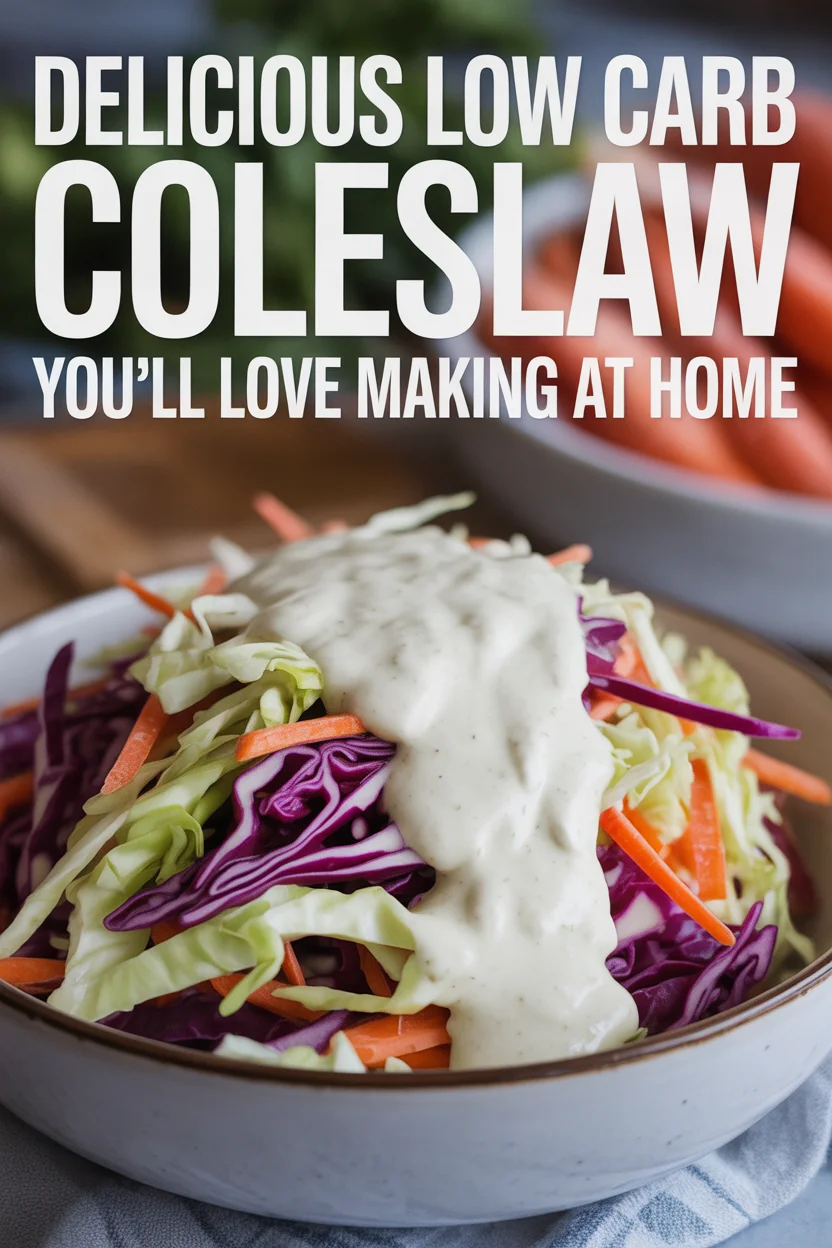
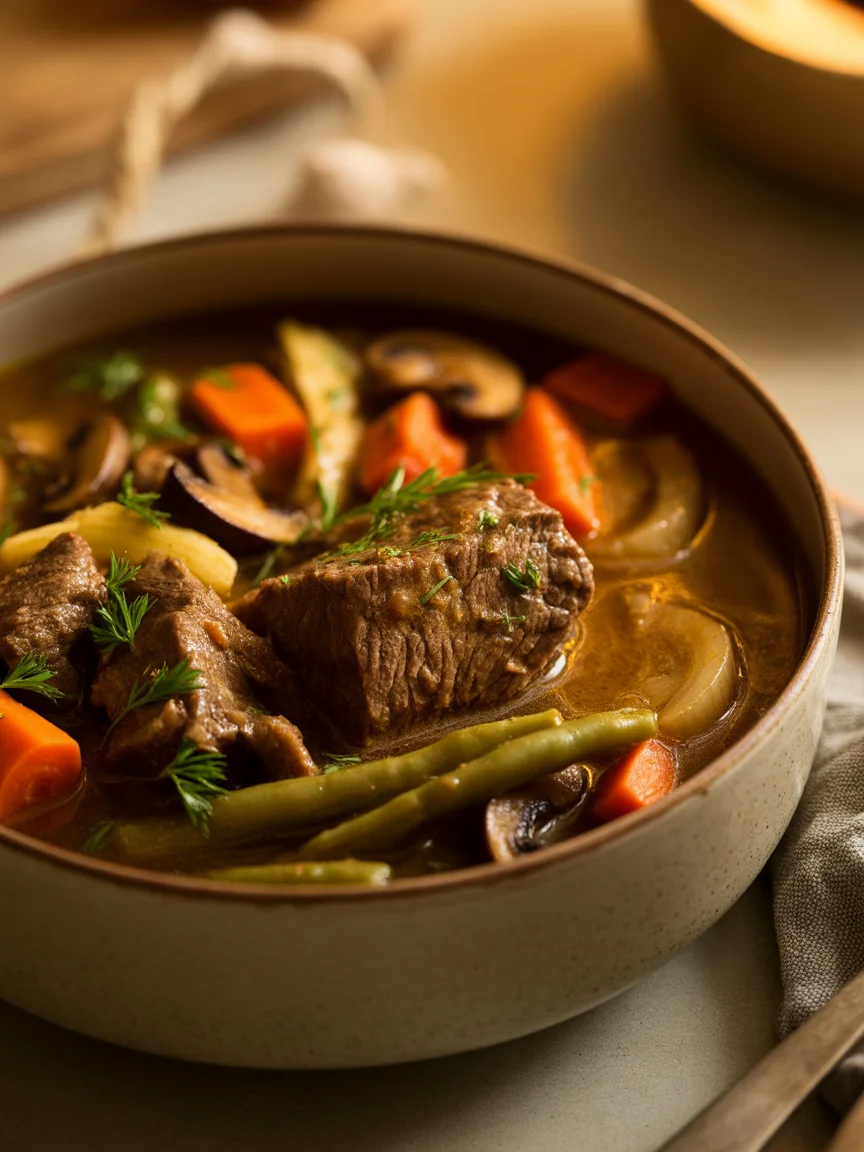
Low Carb Coleslaw is basically a life-saver for those BBQs when everyone else is loading up their plates with potato salad. (Been there, gnawed at celery, regretted my choices.) If you’re tired of sad, limp lettuce dinners, this crisp keto coleslaw swoops in with real flavor—yeah, not just filler. Plus, it pairs up outrageously well with main dishes like these keto beef back ribs I tried last weekend. The best part? You can make it in, like, ten minutes flat.
Delicious Low Carb Coleslaw You'll Love Making at Home

Why Make This

I hardly ever rave about a “side salad,” but this low carb coleslaw cracks the code for real, actual taste satisfaction—without blowing your carb budget. Why settle for plastic-tub deli coleslaw crammed with sugar? Homemade is way fresher. You control all the flavors (and the texture, crunchy or creamy, totally up to you).

Here’s the secret sauce: this keto coleslaw can run as a proper lunch, not just some afterthought. One bowl and you’re full, happy, and not bored out of your mind. Call me dramatic, but after one too many limp drive-thru salads, I think I earned the right to be a little hyped. Actually, my mom used to fold a bit of celery salt in—wow, just trust me, it makes a difference.

“I made this for my family’s Sunday cookout, and everyone (even my picky brother-in-law who ‘hates diet food’) asked for seconds. There weren’t even leftovers.”

How to Make Keto Coleslaw

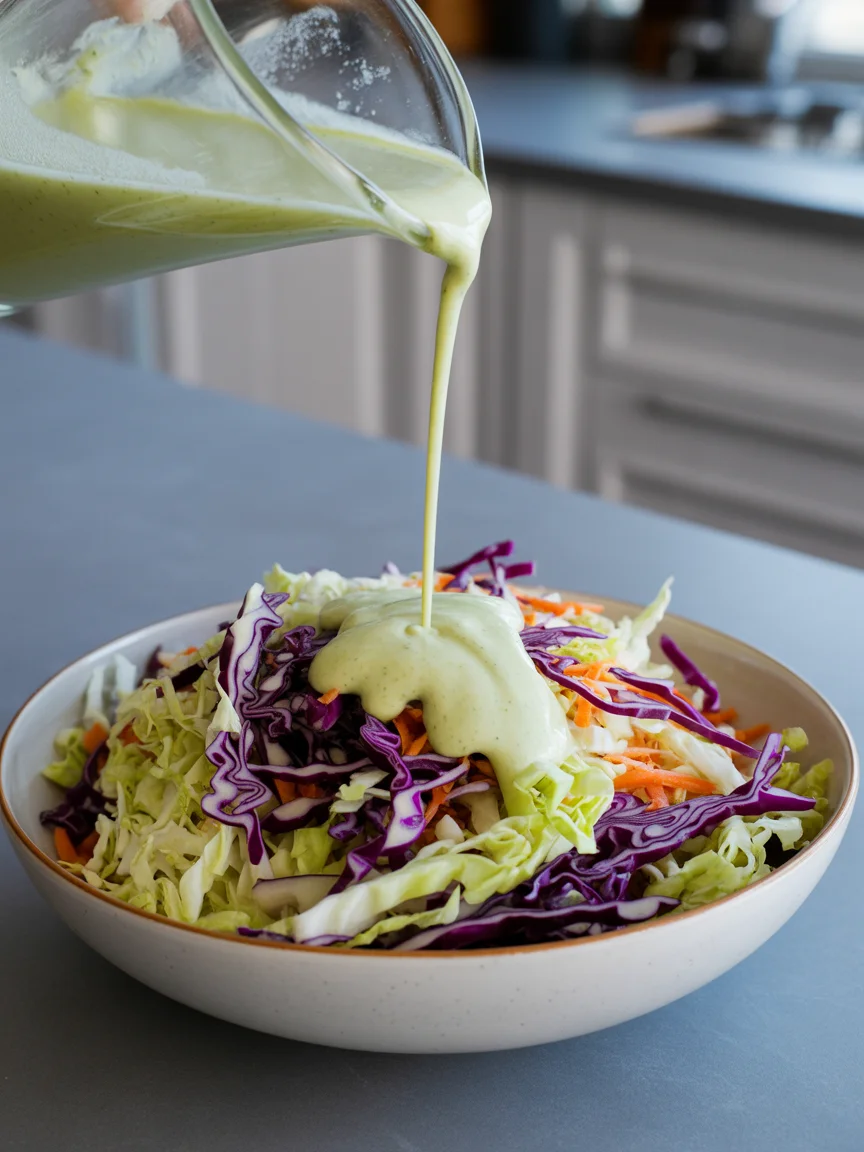
Okay, so get ready—because this process is about as easy as tying your shoes, and frankly more rewarding. Grab a big mixing bowl and toss pre-shredded coleslaw mix in it. Of course, you can shred your own cabbage and carrots if you’re feelin’ overachiever-y, but I’m not here to judge shortcuts. Pour in your dressing ingredients (mayo, vinegar, little squeeze of mustard, sweetener if you want it), then mix ‘til everything’s cozy together. I like using my hands for this step. Is that weird? Possibly. But it works.

You’ll want to let the flavors mingle for at least 10 minutes in the fridge. Longer is good, too, especially if your patience is stronger than mine. The result? Crisp, lightly tangy low carb coleslaw—never soggy or bland. That’s basically it. Told you, not rocket science, just tasty.

Ingredients & Substitutions

So, here’s your friendly, casual shopping guide for low carb coleslaw. (Don’t sweat it if you’re missing one thing.)

  • Shredded cabbage: Green or mix in purple for some pizzazz.
  • Shredded carrots: Use a tiny bit, or just skip if you’re extra strict with carbs.
  • Mayonnaise: Go for full-fat, no weird oils, or choose avocado mayo.
  • Vinegar: Apple cider or white vinegar, honestly, I’ll use what I find.
  • Dijon or yellow mustard: Because a little tang never hurt anyone.
  • Sweetener: Just a dusting of Swerve, monk fruit, or skip for ultra low carb.
  • Salt and pepper: Adjust to taste. Don’t skimp.

Sub ideas? Sure. Greek yogurt works if you want a lighter touch, and a small bit of celery salt or fresh dill totally transforms the vibes. Don’t get fussy. Use what you have.

Serving Suggestions

Low carb coleslaw isn’t just for stuffing the corner of your BBQ plate (although, go for it). If you’re on the hunt for ideas, here are a few tasty ways I like to use mine:

  • Pile it next to smoky keto beef back ribs for a classic backyard feast.
  • Dunk it on burgers (or even a low-carb bread wrap), because crunchy coleslaw is unbeatable as a topping.
  • Roll it up in lettuce wraps for a fast lunch (kids actually eat it this way, who knew).
  • Serve alongside low carb spaghetti squash and meatballs for a totally filling dinner.

Honestly, you could just eat a whole bowl for lunch with a little crumbled bacon on top. No one’s judging—not here.

Variations for Keto Coleslaw Dressing

I get bored fast. No shame. So I switch up my low carb coleslaw dressing depending on my mood. Sometimes I’ll blend in a dollop of sour cream, just for extra creaminess. Or, swap half the mayo for unsweetened Greek yogurt if you want that bit of tang and a protein boost. Occasionally, I’ll add a pinch of smoked paprika or toss in some chopped jalapeno for a faint kick (this is criminally underrated, by the way).

If you want it a little bit “fancier,” sprinkle in some green onions, chopped parsley, or even crumbled blue cheese. The basics stay the same, but a little dash of adventure keeps things fresh. If you get weird looks—let ‘em taste first, then they get it.

Common Questions

Can I use bagged coleslaw mix?
Totally, and I usually do. Saves time and cleaning up the cutting board.

Is it okay to make this ahead?
Yup, actually better that way. The flavors soak in. Just don’t leave it for days, or it’ll get watery.

Can I freeze keto coleslaw?
I’d say nope. Mayo doesn’t freeze nice, and thawed coleslaw is a sad, watery mess.

Is store-bought mayo okay?
Yes, but peek at the ingredients—avoid added sugars if you can.

Is this recipe kid-friendly?
Mine eats it (if there’s bacon sprinkled in), so yes, probably.

Give It a Whirl—You’ll Thank Yourself Later

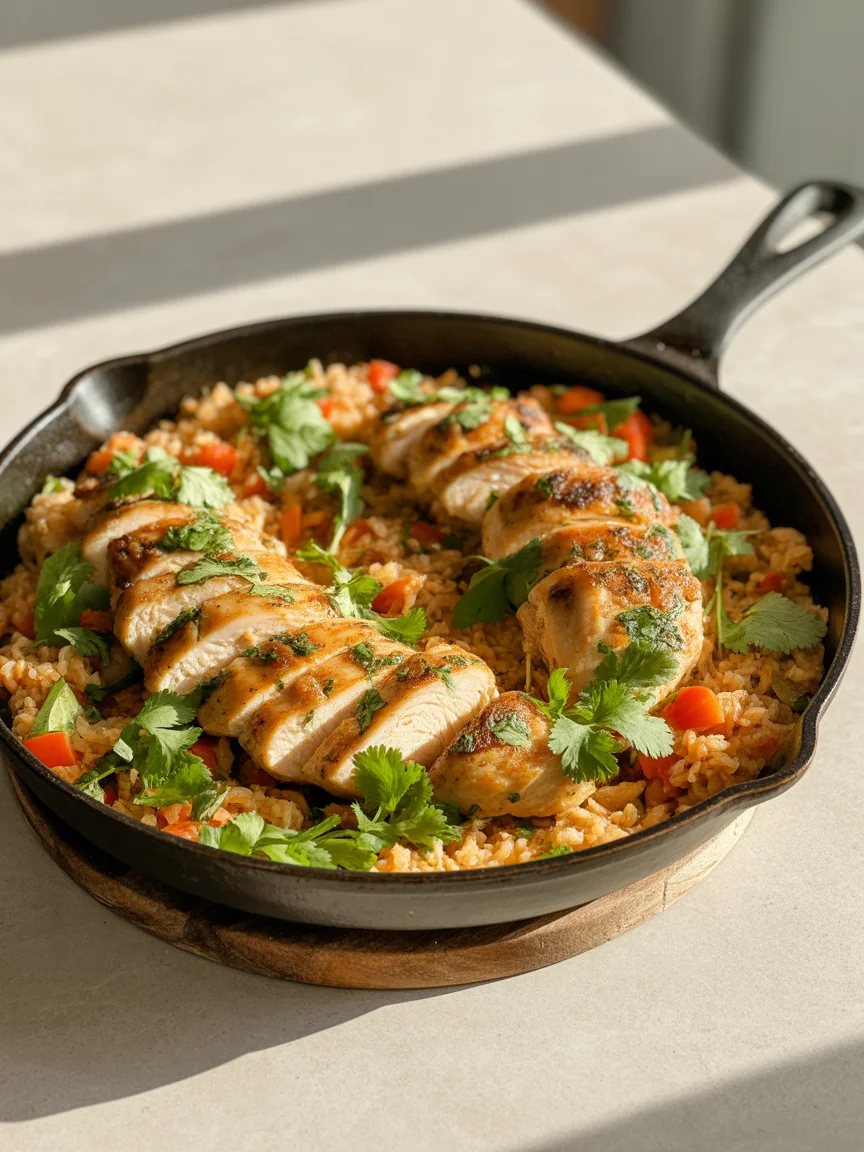
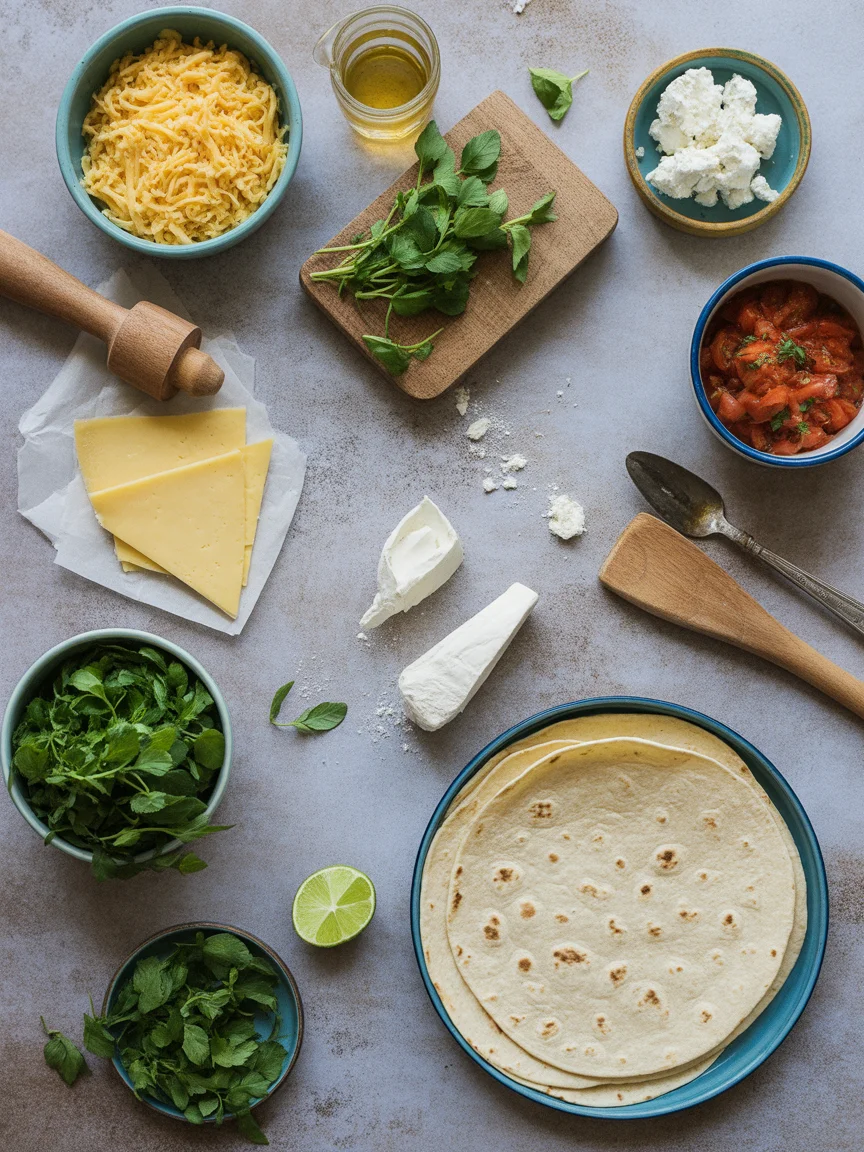
All in all, this low carb coleslaw has rescued me from many boring meals and bland BBQs. You get crunch, creamy dressing, some serious flavor—without falling off your carb goals. It goes perfectly with all sorts of low carb favorites, and if you want inspiration for more dinners, check out recipes like these keto beef back ribs or a super cozy keto chicken tortilla soup. And don’t just trust me—plenty of others are raving about their own versions in these recipes for the Best Keto Coleslaw Recipe, a quickie Keto Coleslaw recipe, and this classic Keto Coleslaw Recipe. Seriously, what’s stopping you? Get out the bowl and go for it.
Low Carb Coleslaw

Sizzling Mexican Chicken and Cauliflower Rice Skillet Delight

Mexican Chicken and Cauliflower Rice always pops up when I’m desperate for something filling but don’t want to surrender my willpower to a pile of empty carbs. Maybe you’re trying to eat lighter, or you just need one good skillet meal for busy weekdays. I totally get it. I’ll be straight—sometimes you crave bold flavors that don’t leave you sluggish. This meal is my “secret weapon” for those nights. By the way, if you love easy skillet vibes, definitely check out these next-level Keto Chicken Nuggets or the go-to comfort of Creamy Tuscan Chicken Soup.
Sizzling Mexican Chicken and Cauliflower Rice Skillet Delight

Understanding the Topic

Alright, so what’s the deal behind Mexican Chicken and Cauliflower Rice? Basically, it’s an easy skillet dinner that takes a classic Mexican chicken situation and says, “Rice? No thanks. Make it veggie.” You load everything into one large pan, toss around some fragrant spices, juicy chicken bits, and bright veggies, then top it all off with cauliflower rice. Sounds fancy, but trust me, it’s foolproof.

This isn’t just a “diet” dish. It’s honestly so full of flavor, you’ll almost forget how healthy it is. I started making it during my “I should cook at least once a week” phase, and it’s stayed in the regular rotation ever since. No complicated cooking moves. Just you, your skillet, and a handful of real-life ingredients from the grocery store. My nephew says it tastes like “a five-star restaurant taco exploded in my kitchen”—which, hey, I’ll take it.

“I couldn’t believe how easy this was to pull off. Big taste, hardly any cleanup. Even my picky teenager went back for seconds.” — Gina R.

Sizzling Mexican Chicken and Cauliflower Rice Skillet Delight

Key Benefits and Use Cases

Now, why should you go for this Mexican Chicken and Cauliflower Rice skillet? First off, it’s speedy, coming together in under 30 minutes—no, really. It fits nearly any diet: low-carb, keto, gluten-free, you name it (unless you’re chicken-averse, then, well… maybe try something else).

This is dinner for the nights when you’re staring down a fridge and thinking, “I only have twenty minutes and zero motivation.” Plus, you don’t have to fuss with side dishes. It’s got protein, veggies, and flavor packed in every single bite. Plus, cauliflower rice actually soaks up all the zesty, spicy notes, so nothing gets lost in the pan.

If you need more “dump and go” inspiration, I seriously recommend peeking at this hearty Easy Keto Chicken Enchilada Casserole Recipe for similar bang-for-your-buck flavor.

Sizzling Mexican Chicken and Cauliflower Rice Skillet Delight

Common Challenges and Solutions

Okay, let’s be real—sometimes cauliflower rice can get soggy or sad. Been there, microwaved that. The trick is not to overcook it. Toss it in right as the chicken’s done, let it mingle just long enough to warm up and grab the seasonings, and don’t walk away from the stove. Use fresh (or very well-drained frozen) cauliflower rice for best results.

Another snag? Dry chicken. No one wants flavorless bird bites. My advice—start with bite-size pieces so everything cooks fast and stays juicy. If the pan’s looking dry, drizzle in some extra olive oil. Don’t skimp on seasoning, either. Mexican Chicken and Cauliflower Rice thrives with bold tastes, so get generous with those spices.

If you’re a kitchen clutz like me, maybe splatter a towel nearby—this one can get a little messy but honestly, totally worth it.

Best Practices

Let’s keep this really practical. Here’s what works for me when I make Mexican Chicken and Cauliflower Rice:

  • Pre-chop EVERYTHING so you’re ready. This dish goes fast and frantic, in a good way.
  • Don’t crowd your pan. Too many veggies, and you’ll get steam instead of sizzle. Use your judgment.
  • Serve it straight from the skillet (less dishes, more flavor).
  • If you want it extra spicy, a dash of hot sauce after cooking takes it to a whole new level.

Expert Tips for Success

Here’s the thing—I’ve tested a bunch of shortcuts, and some actually work. For example, swap in store-bought cauliflower rice (no shame). If you’re feeling lazy, grab rotisserie chicken, shred it, toss it in when the veggies are cooked—tastes awesome and takes no time at all.

Also, lime juice at the end? Non-negotiable. The brightness pulls everything together like magic. If you have a bit of cotija or cheddar, sprinkle it on top. It won’t hurt, trust me.

One time, I even tossed in leftover How to Make Keto Stuffed Peppers Without Rice from the previous night. Wild combo, but… wow.

Common Questions

Q: Can I use frozen cauliflower rice?
A: Yes, just thaw and drain first so it doesn’t water down your skillet.

Q: What if I don’t have chicken breasts?
A: Chicken thighs work great—honestly, even leftover cooked chicken can jump in at the end.

Q: Is this spicy?
A: It’s as spicy as you make it. Jalapeno optional, chili powder to taste. Start mild, add heat if you want.

Q: How long does it last in the fridge?
A: Up to three days. I love leftovers the next day—sometimes the flavors get better.

Q: Can I make this dairy-free?
A: Yup! Just skip the cheese topping. Still super tasty.

Give This Flavor Bomb a Spin!

Life’s way too short for boring chicken. This Mexican Chicken and Cauliflower Rice skillet is easy, crazy flavorful, and honestly feels fresh every time. You can shake things up by looking at dishes like Mexican Chicken Cauliflower Rice Skillet – Emily Bites for a different twist, or check out Mexican Cauliflower Rice Casserole – Healthy Liv if you’re craving a casserole version. Seriously, try this once and you’ll want to add it to your weekly lineup. Grab your skillet, blast your favorite playlist, and get cooking. You’ll be glad you did!

Mexican Chicken and Cauliflower Rice

A quick and flavorful skillet meal that combines juicy chicken, vibrant veggies, and cauliflower rice for a satisfying low-carb dinner.
Prep Time 10 minutes
Cook Time 20 minutes
Total Time 30 minutes
Course Dinner, Main Course
Cuisine Mexican
Servings 4 servings
Calories 350 kcal

Ingredients
  

Main Ingredients

  • 1 pound chicken breasts, diced You can also use chicken thighs or leftover cooked chicken.
  • 2 cups cauliflower rice, fresh or frozen Thaw and drain frozen rice before use.
  • 1 cup bell pepper, diced Any color works.
  • 1 cup onion, diced
  • 2 tablespoons olive oil To drizzle if the pan looks dry.
  • 1 teaspoon chili powder Adjust to taste for spice preference.
  • 1 teaspoon cumin
  • 1 teaspoon garlic powder
  • 1 teaspoon lime juice Non-negotiable for brightness.
  • 0.5 cup cotija or cheddar cheese, optional To sprinkle on top.
  • 1 jalapeno sliced, optional For additional spice.

Instructions
 

Cooking

  • In a large skillet, heat olive oil over medium-high heat.
  • Add diced chicken and season with chili powder, cumin, and garlic powder. Cook until golden brown and cooked through.
  • Add bell pepper and onion to the pan, sauté until softened.
  • Stir in cauliflower rice, mixing well, and allow to heat through, about 3-5 minutes.
  • Drizzle with lime juice and stir to combine.
  • Remove from heat and sprinkle with cheese (if using) and jalapeno slices before serving.

Notes

For best results, avoid overcrowding the pan and pre-chop all ingredients. Serve directly from the skillet to retain flavor, and feel free to experiment with extra spices or toppings.
Keyword Healthy Dinner, Keto Friendly, Low Carb, Mexican Chicken, Skillet Meal

Deliciously Creamy Cottage Cheese Egg Salad You’ll Love

Cottage Cheese Egg Salad. Now, tell me, has there ever been a lunch or snack you craved that felt both rich and super light at the same time? Here’s the snag – most salads leave you hungry, and I don’t know about you, but who wants to eat again in a couple hours? That’s why I swear by this one. It keeps me full, it’s simple, and my picky-eater friend (let’s call him Dan) actually asked for seconds. If you’re ever in a rut after making something like Keto Philly Cheesesteak Casserole or need something easy after your Keto Eggplant Parmesan flopped (it happens, let’s be real), this one’s a life-saver.
Cottage Cheese Egg Salad

Key Benefits of the Topic

Let’s just talk honest facts for a second. Why even bother with cottage cheese egg salad? First of all, it’s packed with protein. Not just a teensy bit – like, you’ll be surprised how much muscle food is in there. That’s probably why some folks say it’s as satisfying as a steak, which feels a bit dramatic, but hey, I respect strong opinions. Second thing is, it’s due to cottage cheese, there’s way less fat but still all that creamy feeling. I mean, you really get that “hmm, velvety” moment in your mouth (totally didn’t expect that the first time). Plus, eggs themselves? Filling. Sometimes I eat this salad after a rough morning and my mood just, I dunno, perks up.
You won’t need weird, fancy ingredients either. Most of what goes in is already knocking around in the back of that fridge of yours. If you’re into meal prep magic, doubling up this recipe is your ticket – keeps in the fridge, totally low fuss. It’s an upgrade from other cold salads, especially if mayo isn’t your thing but you still love creamy.
If your usual go-to is just plain eggs or something like an old-school tuna salad, this, my friend, is a major glow-up.

“I never thought I’d actually enjoy cottage cheese until I tried this egg salad. Now I keep a container in my fridge just for this recipe!” — Monica, actual real-life cottage cheese convert

Deliciously Creamy Cottage Cheese Egg Salad You’ll Love

Common Misconceptions About the Topic

Alright, elephant in the room here: doesn’t cottage cheese taste weird? Or is it going to make my food all watery? I asked myself those same things. People seem to think it’s bland, sometimes “too lumpy” (yes, a quote from my brother), or simply too diet-y. None of that’s true if you do it right.
What surprised me most? It’s not an acquired taste when you add a little seasoning and mix it with eggs. The combination gets rich and savory, but not heavy like mayo-based salads. Also, cottage cheese won’t make your salad sad and soggy – but, honestly, just drain off any extra liquid first.
Also, just so you hear it from a real person – you definitely don’t need some special brand of eggs or fancy cottage cheese. Store brand is fine. Organic if you’re feeling it, but not necessary at all.
One more thing: people think all protein salads are bland. Not this time. The tang from cottage cheese gives a fresh bite. It totally makes the salad “pop” in a way that classic egg salad just can’t.

Cottage Cheese Egg Salad

Step-by-Step Guide to Understanding the Topic

Let’s get to the nitty-gritty, the actual hands-in-the-bowl action. You only need five things, give or take: eggs, cottage cheese, some kind of mustard, scallions, salt and pepper. Okay, that’s six, but who’s counting?
Boil your eggs – don’t overthink it. I like ‘em on the hard, sturdy side (nothing worse than a runny egg in salad, ew). Peel, then chop them pretty chunky. Cottage cheese? A few big spoonfuls right on top. Add a squirt of mustard for a zingy kick. Salt and pepper – go with your heart, I’m not judging. Scallions are optional, but add a green snap I absolutely love.
Gently… and I mean gently… fold it all together. You want chunks, not mush. Taste-check it. Maybe add a sprinkle of paprika – that’s my secret move. Refrigerate for ten or so minutes if you want it cold, but if we’re being honest, I eat it right away most days.
This is what I do for a quick lunch, but you can double it if you’re a meal-prep hero or just naturally chaotic like me.

Expert Tips for Success in the Topic

Here’s the rundown you wish someone told you earlier. Use small-curd cottage cheese if you want things to stay chunky – big curd is fine but just looks kind of, I don’t know… odd? And always drain the cottage cheese if it seems really watery.
Add a dash of smoked paprika. Makes me feel like a five-star chef, even when I’m in sweats. And chop the eggs after cooling – warm eggs will melt the cottage cheese and turn it weird. Oh, and don’t store it more than two days. Learned that the hard way… don’t ask.
One random trick? Mix in a few chopped pickles or capers for tang. And, if you’re feeling extra, a squeeze of lemon juice wakes up the whole thing.
For real, try serving this next to your Keto Eggplant Parmesan on a summer night. Your friends will be shocked when it all disappears.
Those little switches turn a humble cottage cheese egg salad into, honest-to-goodness, a family-favorite situation.

Serving Suggestions and Fun Twists

  • Spoon it on crunchy lettuce for a keto-friendly wrap – actually tastes better than bread, not kidding.
  • Tuck it in a low-carb pita, or pile it high on a crisp rice cake if you just don’t care about the low-carb thing.
  • Smash some avocado on toast, then mound the salad on top for a killer breakfast.
  • Oh! It also makes a good “dip” for carrot sticks or snap peas when you want snacky, deconstructed action.

Real-World Examples and Case Studies

I’ll cut to the chase. My neighbor, Sarah, once swore she’d never touch cottage cheese again after a weird diet in college. I handed her a scoop of this salad, and she texted the recipe to her mom before she finished eating (cue shocked emoji face).
Another friend of mine, obsessed with all things Keto Philly Cheesesteak Casserole, started packing this instead for her work lunches. She told me, “I’m saving money, feeling full, and weirdly, my kids like it too.” Pretty sure that counts as a legit case study, right?
Heck, just last week I made a big bowl for a lake picnic. Black pepper, a sprinkle of smoked salt, a tiny bit of fresh dill, and, not exaggerating, the whole group polished it off before the sandwiches. It’s the random crowd-pleaser nobody expects.
People pop in saying, “no thanks” – then, hmm, end up scooping double helpings. Makes you wonder why you didn’t try it sooner.

Common Questions

Is this cottage cheese egg salad actually filling or will I need a second lunch?
You’d be surprised! It sticks with you for a while – protein power, seriously.

Do I need fancy cottage cheese?
Nope. Any supermarket variety is good. I use whatever’s on sale, honestly.

Can I make it ahead of time?
Sure can. Just keep it in the fridge and eat within a couple of days for best taste.

Is this okay for keto or low carb?
Yes. Totally fits keto goals and tastes way better than some sad lettuce wrap.

Will kids actually eat this?
Shockingly, yes – especially if you skip the green onions or add a bit of cheddar.

The Easiest Upgrade to Your Lunch Routine

Honestly, cottage cheese egg salad is just that good. It’s light, protein-rich, and way more interesting than plain old egg salad. Whether you’re into meal prep or need something last-minute, this has you covered.
And for those who want more ideas, both these pages have inspired me: Cottage Cheese Egg Salad (High Protein) – The Balanced Nutritionist and Cottage Cheese Egg Salad – Healthyish Foods.
Just give this one a whirl. You might even find yourself side-eyeing those “fancier” recipes you used to make!

Cottage Cheese Egg Salad

A light and protein-packed egg salad made with cottage cheese, perfect for a satisfying lunch or snack.
Prep Time 10 minutes
Cook Time 10 minutes
Total Time 20 minutes
Course Lunch, Snack
Cuisine American
Servings 4 servings
Calories 250 kcal

Ingredients
  

Main Ingredients

  • 4 pieces eggs, hard boiled Boil until firm.
  • 1 cup cottage cheese Use small-curd for better texture.
  • 1 tablespoon mustard Use your favorite type for flavor.
  • 2 tablespoons scallions, chopped Optional for a fresh crunch.
  • to taste salt and pepper Adjust according to preference.
  • optional smoked paprika Adds a nice flavor boost.

Instructions
 

Preparation

  • Boil the eggs until hard and firm, then peel and chop them into chunky pieces.
  • In a mixing bowl, combine the chopped eggs with cottage cheese.
  • Add mustard, salt, and pepper to taste.
  • Gently fold the ingredients together to keep chunks intact.
  • Refrigerate for about 10 minutes for a chilled salad, or serve immediately.

Notes

For added flavor, mix in chopped pickles or capers. Serve on lettuce for a low-carb option or with rice cakes.
Keyword Cottage Cheese, Egg Salad, Low-Carb, Meal Prep, Protein Salad

Satisfy Your Cravings with These Flavorful Keto Taquitos

keto taquitos have saved my cravings way more times than I’ll admit. You know that moment, right? It’s Saturday night. Everyone’s eating chips and wraps. Meanwhile, you’re thinking… will I really survive on celery sticks again? No way, friend. There’s better stuff, even if you’re trying to stick to your low-carb plan. Oh, and if you ever get bored and need breakfast inspo, here’s some breakfast keto ideas worth checking.
keto taquitos

Ingredients for Keto Taquitos

You’re gonna love how easy the ingredients are (half the time, I’ve got most of these chilling in my fridge already). Here’s what you need for keto taquitos:

  • Rotisserie chicken, or honestly any leftover chicken you have hanging around works. If you cook a fresh chicken, even better, but leftover is clutch.
  • Shredded cheese like cheddar, mozzarella, or that jack cheese you stole from taco night. Don’t go fancy unless you want to.
  • A couple cream cheese scoops. This keeps everything stick-together and creamy, instead of, well, dry cardboard.
  • Seasoning: Taco seasoning, a little salt, and pepper. Add chili powder or cumin if you dare.
  • Low-carb tortillas, or, listen, you can get super creative and use just cheese for the “shell.” (It gets all crispy and wild.)
  • Favorite toppings: guac, salsa, sour cream, or whatever stuff you’re feeling. Lettuce for crunch? I say yes.

“These keto taquitos taste just like my old favorite, but I don’t even miss the carbs! My kids even steal them off my plate!” – Jamie T.

keto taquitos

How to Make Keto Taquitos

So, let me keep it stupid-simple for you (because I hate super-precise instructions too). First, shred your chicken. If it’s cold, give it a 15-second zap in the microwave so you don’t freeze your fingers off.

Now, mix the chicken, shredded cheese, cream cheese, and seasoning together in a big bowl. This part always gets a bit messy but trust me, it’s worth it.

Next: take your low-carb tortillas (or cheese wraps, if you’re wild like me some days). Put a spoonful of your chicken-cheese mix on one side. Roll that bad boy up tight. Place each one seam-side down on a baking sheet.

Bake them at around 400 degrees until they look golden and the cheese bubbles. Usually 15 minutes max. If you’re using cheese shells, watch close. Cheese goes from bubbly to burned quicker than you’d think.

Once they’re done, let them rest for a couple minutes before moving or they’ll fall apart. Still, even if they do, scooping taquito pieces is kind of fun, not gonna lie.
keto taquitos

Tips, Tricks, & Variations

Okay, now here’s where I (maybe) go a little overboard, but, hey, trying stuff out is half the fun. Some days I use shredded beef if I’ve got some leftover. Or, breakfast for dinner? Yup, I’ve popped in scrambled eggs and bacon, then called it creative.

Want it spicy? Toss in diced jalapeños or use pepper jack cheese. If your shells are falling apart (it happens), stick with pure cheese shells. Just sprinkle cheese on a baking tray, bake till bubbly, let it cool for a sec, then roll fast! Yep, watch those fingers.

You don’t have cream cheese? Sour cream works in a pinch. Heck, I’ve even skipped it entirely and still loved the results.

Another game-changer? Freeze the chicken mix in portions, so you can make fresh keto taquitos whenever the mood strikes. Who says lazy can’t be smart? Sometimes I even double the batch for this very reason.

“I was shocked how kid-friendly these are. We even dipped them in ranch!” – Alex W.

Serving Suggestions

Alrighty, here’s what I like:

  • Pile on toppings like fresh salsa, guacamole, or sour cream. Makes it feel practically five-star.
  • These are killer beside a crunchy salad, especially if you drizzle a little lime juice on the greens.
  • Pair ’em with a warm bowl from here: soup keto options if you’re feeling cozy and want a nice warm-up.
  • Honestly, they make an A+ party snack if you cut ’em into halves or thirds.

If you serve these for lunch with a side of fresh veggies, people might just start coming to your house for food every day. Fair warning.

Storage

Storage is weirdly simple. If by some miracle you have leftovers (never happens here, honestly), just pop them in an airtight container. Fridge life, they’ll last up to three days; but any longer and they get a hint too soggy for my taste.

Reheat them in the oven or an air fryer if you’re picky about crunch (I am), but microwave works if you’re in a rush. Heck, cold isn’t too bad either! Oh, and they freeze great for those grab-and-go days. Just wrap them tight in foil or zip bags, so they don’t get freezer burn.

Common Questions

Can I make these ahead of time?
Absolutely yes, I often prep the filling the night before, roll them up and bake when I’m hungry.

Are these keto taquitos really low-carb?
They sure are, as long as you stick to low-carb tortillas or cheese shells, you’re golden.

What’s the best cheese to use for cheese shells?
I love cheddar or mozzarella for melting, but you can mix them for flavor punch.

Can I swap out chicken for another meat?
Definitely. Try cooked ground beef or turkey (even pork works great).

Do they crisp up without oil?
If you go with cheese shells, just the baking will crisp them up nice and crunchy. Tortillas may need a touch of spray if you like extra crunch.

Why These Keto Taquitos Will Win You Over

There you go – I spilled all my secrets for the best keto taquitos. They’re easy, fast, and yes, even my super picky brother likes them. Don’t let boring low-carb food get you down. Give these a whirl, and thank me later! If you want to see more versions and tips, the Best Keto Taquitos Recipe from Delish is honestly amazing, and Keto Taquitos from Kicking Carbs showcase even more clever ideas. Oh, and if you’re a green chile fan? Don’t sleep on these killer Keto Green Chile Chicken Taquitos by Maebells either. Happy taquito-ing – you’re gonna love every crunchy, melty bite!

Keto Taquitos

Delicious and easy-to-make keto taquitos that satisfy your cravings without the carbs.
Prep Time 10 minutes
Cook Time 15 minutes
Total Time 25 minutes
Course Appetizer, Snack
Cuisine Keto, Mexican
Servings 4 servings
Calories 250 kcal

Ingredients
  

Main Ingredients

  • 2 cups shredded rotisserie chicken Or any leftover chicken
  • 1 cup shredded cheese Cheddar, mozzarella, or jack cheese
  • 1 cup cream cheese For creaminess
  • 1 tablespoon taco seasoning Add chili powder or cumin if desired
  • to taste salt and pepper
  • 4 pieces low-carb tortillas Or use just cheese for the shell

Toppings

  • to taste guacamole
  • to taste salsa
  • to taste sour cream
  • to taste lettuce For crunch

Instructions
 

Preparation

  • Shred your chicken. If it’s cold, microwave for 15 seconds.
  • In a large bowl, combine shredded chicken, cheese, cream cheese, and taco seasoning.
  • Place a spoonful of the chicken mixture onto one side of each tortilla. Roll tightly and place seam-side down on a baking sheet.

Baking

  • Bake at 400°F (200°C) for about 15 minutes or until golden and cheese is bubbly.
  • Let the taquitos rest for a couple of minutes before serving.

Notes

These taquitos can be made ahead of time by prepping the filling the night before. Leftovers can be stored in an airtight container for up to 3 days. They can be reheated in the oven, air fryer, or microwave.
Keyword Easy Recipe, Healthy Snack, Keto Taquitos, Low Carb, Taquitos

Savory Keto Beef Stew That Will Warm Your Heart

Let’s get real for a sec: keto beef stew. Ever find yourself standing in front of the fridge, craving something cozy, but then it hits you—ugh, carbs. Classic stew is a comfort bomb, sure, but also a potato rocket. Been there, and I got tired of missing out. So, today, I’m laying out my absolute favorite way to make keto beef stew where you’ll never even miss the traditional stuff. Trust me, it’s got those rich, sink-your-spoon-in flavors. Also, if you’re all about hearty meals, you’ll want to peek at this easy-breezy keto beef back ribs recipe—it fits right in with the low-carb feast vibe.
keto beef stew

How To Make Keto Beef Stew

Alright, let’s not get fussy. You don’t need any special chef moves to pull off this keto beef stew. The meat’s the star—don’t skimp on it. I usually grab some chuck roast because it gets super tender and just kinda falls apart. Cube it up, and salt the heck out of it.

Pop those beef cubes in a hot Dutch oven or deep pot. Flip ‘em ‘til they’re brown all around. Leave ‘em alone at first, that’s how you get that flavor party started. When they’re ready, toss in garlic, onions, and a few low-carb veggies. Celery, mushrooms, a bit of carrot for color (relax, it won’t ruin your macros—I promise). Splash in some beef broth, a can of diced tomatoes (yes, tomatoes in stew—fight me), a bay leaf, and whatever dried Italian herbs give you warm fuzzy feelings.

Let it do its thing on low heat for like two hours. Yeah, you gotta wait. But that’s the deal with stew, right? The meat gets all dreamy, and the house smells amazing. Maybe pop over to check out those keto dinner ideas while you wait. Oh, and absolutely taste as you go—my first batch was kinda blah until I tossed in more salt and pepper. It’s a stew, not a science experiment.

“My husband swore he’d never touch keto stew, but now he asks for it every week. Didn’t even realize there were no potatoes!”—Amanda, Michigan

Savory Keto Beef Stew That Will Warm Your Heart

What To Serve With Keto Beef Stew

I always say, stew without a side is like a campfire without marshmallows. Maybe that’s dramatic—but really, you’ll wanna round out your keto beef stew meal. Here’s my go-to list:

  • A crisp salad (romaine, arugula, radish—just don’t overthink it)
  • Roasted cauliflower or a heap of buttery green beans
  • Keto biscuits or toasted low-carb bread (especially if you’re into dunking)
  • If you eat dairy, sprinkle a little grated cheese right over the top

Sometimes I serve it with cheesy spaghetti squash casserole from the site. Kids love it. Husband loves it. I basically never get leftovers, which is a bummer and a blessing.
keto beef stew

Thickening Low Carb Stew

This trips people up a lot. Classic stews get their thickness from spuds or flour—but not this keto beef stew. Instead, grab xanthan gum or even chia seeds (sounds weird, but it works). Just a tiny sprinkle goes a loooong way. Stir well and let it simmer uncovered for the last 20ish minutes.

Another trick? Simmer it longer, lid off. Liquid evaporates and you’re left with a super satisfying, thick stew. Oh, and don’t forget mushrooms add body, too.

Best tip? Don’t panic if it seems thin at first. Keto beef stew thickens as it cools, promise.

More Low Carb Keto Beef Recipes

If you’re in this for the long haul (hey, I salute your willpower), you definitely don’t have to settle for bland. I’ve got a whole arsenal of beefy low-carb recipes. For dinner or whenever you want that comfort food feeling. Cheesy spaghetti squash alfredo is one of my repeat dishes, and don’t even get me started on easy keto salmon—it breaks up the beef routine, right? Variety is the spice of not-getting-bored-on-keto, after all.

Pop by the site if you need inspo: everything from casseroles to creative twists on classics. You can browse all kinds of keto soups too, if you want to mix it up but keep it cozy.

Storage

Now, don’t make my rookie mistake—keto beef stew keeps like a champ in the fridge. Toss leftovers into an airtight container (plastic, glass, whatever’s handy) and it’s good for four days easy. Sometimes it’s even better on day two. For longer, just freeze in portions. It reheats perfectly—microwave, stovetop, either works. Kids steal it for school lunches and don’t even realize they’re eating keto. Major win.

Common Questions

Does keto beef stew taste like regular stew?
Honestly? Yes! If you season it right, you won’t miss the potatoes. The beef and veggies still do all the heavy lifting.

Can I use a slow cooker?
Sure can. Do the browning part first for better flavor, then dump it in on low for 7–8 hours.

Is it spicy?
Totally up to you. I use black pepper and maybe a pinch of chili flakes if I’m feeling bold.

How do I make it dairy free?
Easy. Just ditch the cheese on top and double-check your broth is dairy free. Nothing else in the main recipe needs it.

What other veggies can I add?
Try turnips, zucchini, or even a bit of kale. Anything low-carb and sturdy works here.

The Stew That Changed My Dinnertime

Let me say it: keto beef stew is a life saver, especially when you want something hearty but gotta keep the carbs in check. Just ask my family—no leftovers means we have a winner. If you want to explore further or compare styles, check out some other top-notch recipes, like this Amazing Keto Beef Stew – Low Carb Maven, or maybe the Best Keto Beef Stew Recipe, and don’t miss The BEST Keto Beef Stew Recipe – That Low Carb Life. Trust your taste buds, experiment a little, and keep cozy this season. Let me know how yours turns out—or what you served it with!

Delicious Cauliflower Pizza Crust You Can Easily Make at Home

Cauliflower pizza crust is my new weeknight obsession, but I know what you’re probably thinking. Is this really pizza? Trust me, if you’ve ever stood in your kitchen, holding that sad, soggy store-bought crust and wondering how on earth people make it crisp, you’re not alone (been there, got the T-shirt). Making it yourself, though, is surprisingly easy once you get the basics down. Stick with me while I walk you through everything: how to choose cauliflower, the steps that actually work, and all the tasty twists you can try. It’s actually easier than you’d think and perfect for anyone who wants pizza on a weeknight without the post-pizza nap. For more healthy twists, check out my cauliflower fried rice recipe—a true midweek lifesaver.
Delicious Cauliflower Pizza Crust You Can Easily Make at Home

What Is the Best Cauliflower to Use?

Picking the right cauliflower matters. Here’s the deal: freshness is king. I always look for heads that feel heavy and tight, not those funky, wilted ones hanging around in the back of the bin. Color? Stick with white. Those deep purple or green varieties are cool for salad but honestly, with pizza, you want classic white for a neutral flavor.
Bagged pre-riced cauliflower from the store is tempting, but only use it if you have zero patience for chopping. I swear, freshly grated at home tastes better and feels crispier. Oh – organic or regular? No life-or-death difference in taste. Use what’s easiest on your wallet.

I tried making cauliflower pizza crust with purple cauliflower once—my nephew called it “alien pizza” and refused a single bite.

Delicious Cauliflower Pizza Crust You Can Easily Make at Home

How to Cook Each Type of Cauliflower

OK, so you picked your head of cauliflower (or grabbed a bag of riced if it’s a Monday and you’re tired). Now what?
First off, don’t skip microwaving or steaming your cauliflower. Raw just won’t work. You want to cook it just enough so it gets soft but not mushy.
For heads, chop into florets, pulse in the food processor a bit so it looks like rice. Five minutes in the microwave usually does the trick. Let it cool or your hands will regret it. Then squeeze out the extra water—seriously, as much as you can.
Pre-riced? Even easier—same process, but skip the food processor. If you don’t drain all that water, the pizza crust will end up floppy and a little sad.
A weirdly helpful note: using a clean kitchen towel is better than paper towels for squeezing. You’ll thank me.

cauliflower pizza crust

Toppings Ideas for Cauliflower Pizza Crust

This is where you can go absolutely wild, honestly. There’s no “right” way to top a cauliflower pizza crust, but I’ll toss out some of my crowd-pleasers.
Start classic: mozzarella, tomato sauce, maybe some pepperoni (my brother’s favorite).
Feeling bold? Goat cheese, arugula, and roasted red peppers are epic together.
Kids in the house? Tiny meatballs or just plain cheese works wonders.
Vegetarian night? Pile on mushrooms, onions, and maybe a little pesto if you’re feeling fancy.
Don’t go super heavy with sauce. Cauliflower crusts love less moisture.

“I was totally shocked how crispy the edges came out. Even my picky five-year-old asked for seconds! New family go-to.” — Renee B.

Tips for Best Results

Let’s get real about what makes cauliflower pizza crust work (or.. totally flops it). If you want the crispiness, these are musts:
First, squeeze out every bit of moisture. Seriously, keep squeezing till your arms are tired. This changes everything.
Mix in one egg for binding, a small handful of shredded cheese (parmesan is delightfully salty), plus salt and pepper. I always throw in a dash of garlic powder.
Bake on parchment paper. Nothing sticks, crust gets golden. Bake first, add toppings second, then bake again. Don’t skip this double-bake step or the crust just isn’t the same.
If your crust breaks? No worries. Call it “rustic flatbread” and act mysterious.

How to Freeze It

Good news—cauliflower pizza crust freezes like a dream. If you want to make a batch ahead and save yourself some weekday work, here’s how I do it:
Let the crust cool completely after baking (don’t top it yet!).
Wrap with plastic wrap, then foil.
Toss in the freezer.
To eat later, thaw in the fridge, bake a few minutes just to crisp up, then top and bake as normal.
Frozen crusts are often even easier to crisp than fresh-made. I love pulling one out for instant “homemade” pizza night.
Serving Suggestions:

  • Top with leftover roasted veggies from the night before.
  • Try BBQ sauce and grilled chicken for a change.
  • Serve in wedges with a salad—you’ll hardly miss regular dough.
  • Drizzle with a little olive oil before throwing on cheese, it takes it up a notch.

Common Questions

Q: Does cauliflower pizza crust actually taste like pizza?
A: Kinda! It’s got a nutty vibe, but with cheese and sauce on top most people forget it’s made from a veggie.

Q: Is this good for low-carb diets?
A: For sure! Cauliflower pizza crust is my backup carb-saver when I’m cutting back.

Q: Can I make it vegan?
A: Yep! Just swap the egg for a flaxseed egg and skip cheese in the mix. Still holds up pretty well.

Q: Why is my crust falling apart?
A: Too much moisture or not enough binder. Squeeze the cauliflower and don’t skip the egg.

Q: Can I use frozen cauliflower?
A: Absolutely. Thaw it, wring out that water, and proceed as normal.

Your New Favorite Pizza Night

By now, you probably know way more about cauliflower pizza crust than you ever wanted to. And hey, if I convinced you to put down the store-bought version and try it yourself, I count that as a win. It’s easy, flexible, perfect for picky eaters, and honestly, way better than people expect. If you want even more tricks to nail it every time, check out this great guide on How to Make Cauliflower Pizza Crust over at Detoxinista, or browse creative spins at Foolproof Cauliflower Pizza Crust from iFoodReal.com. And when you’re ready to get next-level, don’t miss the Best Cauliflower Pizza Crust Recipe by Delish for wild topping ideas. Promise, you’ll never look at sad frozen pizzas the same way again. Give homemade a shot and let me know what wild combo you end up loving!

Savor These Tasty Baked Eggs and Zoodle Bundles for Breakfast!

Ever wake up craving something tasty, but totally not up for another boring omelet? Yeah, me too. Baked eggs and zoodle bundles have totally rocked my mornings lately. Not only are they easy, they’re kinda fun to make and eat—I mean, come on, noodles made out of zucchini? My kid calls them “breakfast wiggles.” Bonus, this is great if you want a low-carb meal that won’t leave you snoozing by 10 a.m. Oh, and if you like zoodles, you’ll probably love this low carb spaghetti squash and meatballs idea too—worth checking out!

baked eggs and zoodle bundles

Recipe Highlight

Okay, let’s talk about why these baked eggs and zoodle bundles are honestly the best way to sneak veggies into breakfast (and actually enjoy it). With just a handful of ingredients, you get something that looks straight out of a five-star restaurant, but takes barely 20 minutes. You twist the zoodles into fun little nests, crack an egg into each one, sprinkle on some cheese (or not, but cheese makes me happy), toss it in the oven, and—voila!—fancy brunch at your kitchen table.

I started making these last year, when my neighbor basically dumped a truckload of zucchini on my porch (thanks, Sharon). Zoodles were my only escape. But, you know what? I love these little guys now. Honestly, they’re cozy, salty, and good even if, say, you overcook your egg a bit—whoops. And you can jazz ’em up with bacon, herbs, pepper flakes—whatever gives you joy.

Fair warning though: these get eaten up faster than you’d expect. If you’ve got teenagers, make a double batch or there will be complaints.

“This recipe totally won me over. I don’t even miss toast anymore!” – Becky, neighborhood breakfast tester

baked eggs and zoodle bundles

How to make zoodles

Alright, so zoodles aren’t as complicated as they sound. Basically, you’re grabbing a zucchini (the fresher, the better) and turning it into these curly noodles. I’ve tried a bunch of ways—here’s the lowdown.

First, you can use a spiralizer. Super fast, but if you don’t have one collecting dust in your gadget drawer, a simple veggie peeler works too. Peel off strips, rotating the zucchini as you go. You’ll end up with slightly flat noodles; honestly, I think these catch cheese even better. For a shortcut, the grocery store sells pre-spiralized zoodles now, but I swear fresh ones taste brighter (and you feel all chef-y making your own).

Now, don’t forget to pat them dry with a paper towel. Zoodles can get a bit soggy if you just toss them in the oven wet, which is… well, not so fun. Let them sit for a minute or two before shaping them into nests.

Pro tip: Salt draws out the moisture! Sprinkle a bit on before baking, let ‘em sit, then use a fresh towel to dab.

Savor These Tasty Baked Eggs and Zoodle Bundles for Breakfast!

Recipe Tip

Making these baked eggs and zoodle bundles is easy, but you can totally mess it up if you’re in a rush (we’ve all done it). Here’s my not-so-secret method for a smooth morning.

First off, crack your egg into a bowl before pouring it in the zoodle nest. You can catch shells (or, you know, rescue the yolk if it tries to run off). If your egg is ginormous, just use half a yolk or grab a smaller egg—trust me, you want it snug, not overflowing. Don’t be shy with seasoning. Zucchini craves a little salt, pepper, and maybe a dash of smoked paprika. If the egg is set but you want the yolk just a little oozy, pull it a bit before you think it’s done. It finishes cooking after you take it out because the pan stays hot.

Oh and, if you’re feeding a crowd—just line up a muffin tin, spin your zoodles into each cup, pour in the eggs, and boom: breakfast for six, no one waiting.

Some great zucchini noodle maker options

Still using that rusty cheese grater from college? Guilty. But look, getting zoodles right is all about the right tool (I’ve learned the hard way—once tried scissors, disaster).

I’m a big fan of the simple hand-held spiralizer (you can nab one for under 10 bucks, usually). Super easy to clean and just the right size. A counter-style spiralizer is for you if you’re the “I need 12 zucchini noodles, ASAP” type or meal prepping for the week (your triceps may get a workout). There’s also a julienne peeler, which is sneaky great—makes kind of rectangular zoodles, so don’t expect Instagram perfection, but they work.

Oddly enough, sometimes those fancy “zoodle makers” at the store are just a pain to store and clean. So if you’re only eating zoodles once in a while, a peeler does the trick, honest.

Some of my favorite spiralized zucchini recipes

Zoodles go way past just breakfast eggs. They’re such a lifesaver on busy nights. Want to try more?

  • Low carb spaghetti squash and meatballs is huge at my house, especially for pasta cravings without the carb coma.
  • Zoodle “pasta” with marinara—that’s basically comfort food with extra veggies.
  • Asian zoodle stir fry is wild easy, just a little soy sauce, and whatever veggies are rolling around in your produce drawer.
  • Zucchini noodle caprese: mozzarella, cherry tomatoes, basil, olive oil, and a squeeze of lemon. It tastes like summer, even in February.

The possibilities keep piling up. If you get tired of zucchini (it can happen), just swap it for another veggie—I once used carrots, worked great.

Common Questions

Can I make these baked eggs and zoodle bundles ahead of time?
Sort of. Zoodles get watery in the fridge, so it’s best to prep everything, then bake ‘em fresh in the morning.

What cheese works best in baked eggs and zoodle bundles?
Honestly, whatever you’ve got. Cheddar, feta, parmesan. I like a good sharp cheddar for bite.

My zoodles get soggy. Help?
Pat ‘em dry really well. Salt and drain before baking, then keep an eye on your bake time. Overbaking = mush.

Do I have to spiralize the zucchini?
Nope. A peeler or even a knife makes strips just fine. Won’t look restaurant-level, but still tasty.

Can I add meat?
Absolutely. A little cooked bacon or sausage in the nest is amazing—boosts the flavor, keeps you full till lunch.

Give Zoodle Bundles a Whirl Tomorrow!

That’s my not-so-secret method for perfect baked eggs and zoodle bundles. They beat a plain old scramble, plus you can make ‘em your own—total win. If you want even more inspiration, check out the cool takes on the Baked Eggs & Zoodle Bundles : r/BreakfastFood thread and see what other breakfast fans are cooking up. Or maybe try a similar twist with something like Zucchini Breakfast Egg Bake for more veggie breakfast ideas. For another creative recipe, don’t miss these Zoodle Egg Nests (Low Carb & Gluten Free)—they’re legendary in the brunch world. Anyway, hope this inspires you to jazz up your morning and maybe dodge that cereal box just once. Happy eating!

Baked Eggs and Zoodle Bundles

A fun and healthy breakfast made with zucchini noodles and baked eggs, ideal for sneaking veggies into your morning meal.
Prep Time 10 minutes
Cook Time 15 minutes
Total Time 25 minutes
Course Breakfast, Brunch
Cuisine American
Servings 2 servings
Calories 250 kcal

Ingredients
  

Main Ingredients

  • 2 Zucchini Fresh and washed
  • 4 Eggs Medium or large
  • ½ cup Cheddar cheese Shredded, optional
  • to taste Salt To season the zoodles
  • to taste Pepper To taste
  • to taste Smoked paprika To taste, optional

Instructions
 

Preparation

  • Spiralize the zucchini or use a peeler to make thin strips, then pat them dry with a paper towel.
  • Sprinkle a bit of salt on the zoodles and let them sit for a few minutes to draw out moisture.

Assembly

  • Preheat the oven to 375°F (190°C).
  • Twist the zoodles into small nests in a baking dish.
  • Crack an egg into each zoodle nest.
  • Season with salt, pepper, and smoked paprika, if desired.
  • Sprinkle cheese on top if using.

Baking

  • Bake in the preheated oven for 15 minutes, or until the eggs are set to your liking.
  • Remove from the oven and let cool slightly before serving.

Notes

For feeding a crowd, use a muffin tin to hold multiple zoodle nests. You can add cooked bacon or sausage for extra flavor.
Keyword Breakfast Recipes, Eggs, Healthy Breakfast, Low Carb, Zoodles

Deliciously Creamy Keto Italian Sausage Soup You’ll Love

keto Italian sausage soup is what you think about when your stomach rumbles and outside is so cold you can see your own breath. Honestly, have you ever stood in your chilly kitchen—wondering what’s both comforting and friendly for your carb count? I’ve been there, staring into my fridge, hoping some magic answer pops out. That’s how I ended up obsessed with this soup. If you like the idea of warming your bones and your taste buds, check out more cozy keto soup recipes too.
keto Italian sausage soup

Cold day keto soups

Soup just hits different when the wind is howling or maybe you’re just feeling one of those “need a hug in a bowl” days. You could make any old soup, sure. But keto Italian sausage soup is a serious cozy-maker. I’ve done the whole “just broth” route, and wow, that gets boring so fast.

The magic here? This soup’s got a rich, creamy feeling but still fits snugly into a keto lifestyle. No guilt. All that flavor. The sausage spices perk things up, while heavy cream adds—what’s the word—luxury? Yes, actual five-star restaurant vibe. Plus, when you make your own soup, you control every single thing in the pot. Salt level, fat level, spiciness… go wild or keep it mellow.

My go-to move is doubling the batch (pro tip). Freeze half for some future day when you feel too lazy to cook or, heck, you just want dinner in five minutes. Trust me, one spoonful and winter feels less gloomy.

“Made the soup for lunch and even my none-to-keto partner got up for seconds. Absolutely delicious!” – Shellie P.

keto Italian sausage soup

Equipment for keto sausage soup

Don’t worry—no fancy stuff needed here. Biggest thing? Grab a big soup pot or heavy-bottomed Dutch oven, if you have one. That’s about it. I stick with a wooden spoon (so I don’t go scraping up my favorite pan) and a sharp knife for chopping veggies.

Cutting board, obviously. If you have a ladle, it makes serving prettier and easier. That’s basically my full setup. Oh, a measuring cup doesn’t hurt if you want it to taste exactly the same each time. But honestly, most of the time I’m just pouring and eyeballing it (oops).

Cooktop works better than anything automatic, in my opinion. You can ramp up the heat, simmer down low, or just sneak a tiny sample without bothering with programmable gadgets. Makes it more personal. People get scared to make soup from scratch, but really—if you can stir and simmer, you’ve got this.

Deliciously Creamy Keto Italian Sausage Soup You’ll Love

Top tips

So. Want your keto Italian sausage soup perfect every time? Here’s the stuff I’ve messed up and learned from (because hey, we all make weird soup now and again):

  • Brown the sausage well. It’s what boosts the taste big-time.
  • Don’t drown it in liquid. Add broth slowly; too much and goodbye creamy feel.
  • Season as you go. Tasting early is not cheating—it’s survival.
  • Stir in cream at the end. Otherwise it might, uh, curdle and look funky.

Usually I toss in some kale or spinach right before the end. Wilts fast, adds color. Also, I let it sit a few minutes before diving in—it gets thicker and tastier. There’s no real downside unless you eat it straight away and burn your tongue, which… been there.

Variations

This soup is sort of a blank canvas for flavor. If you’re a wild child with your food, go ahead and shake things up. I’ve swapped sausage types—hot Italian, sweet, even turkey—and each gives a different kick. If you’re not about dairy, coconut cream can sneak in as a sub, with a tiny change in taste.

Got leftover veggies? Zucchini or peppers work just fine. Some folks like to add a splash of tomato puree for a tangy bite. Mushrooms, too, if you’re that kind of person. Making it spicy? Hit it with more red pepper flakes. Oh, and if you want other cozy keto dinners, that cheesy spaghetti squash keto casserole also rules.

Serve it different every time—you get variety but the same cozy spirit. Sometimes new favorites happen by accident!

What to serve with Italian sausage soup?

Honestly, this keto Italian sausage soup kind of owns the meal all by itself. Still, sometimes you want a little something extra to round things out. Here’s what I like:

  • Parmesan chips for crunch (they’re easy if you bake cheese on parchment).
  • Simple salad dressed with olive oil and lemon, for some zing.
  • Keto garlic bread if you’re feeling ambitious.
  • Or just a warm cup of black tea, especially if you’re chilly!

Trust me, the soup’s the star. Everything else is just backup singers. If you want dessert, by the way, there’s a whole trove of low-carb sweet treats out there after dinner.

Common Questions

Can I freeze keto Italian sausage soup?
Absolutely. Just let it cool fully, store in a zip bag or container, and freeze. When you reheat, do it slowly so the cream doesn’t separate.

Is heavy cream necessary?
Nope. You can use coconut cream or even almond milk, but expect a little change in taste and texture.

What sausage works best?
I prefer spicy Italian, but any uncooked sausage with lots of flavor does the trick.

How long will it keep in the fridge?
Usually about 3-4 days, if you don’t gobble it all up first.

Can I make it dairy-free?
Yep, coconut cream’s your friend here. Just double-check your sausage isn’t hiding any lactose.

This soup makes winter actually fun

The bottom line? Keto Italian sausage soup is honestly my winter miracle. You get warm, full, and happy without backtracking on your keto goals. If you like this one, maybe peek at recipes from Creamy Keto Italian Sausage Soup – Explorer Momma for more spins and ideas. Or, you might want to try The Best Keto Creamy Italian Sausage Soup – Thinlicious, which gives a totally different sausage vibe. And don’t forget Italian Sausage Vegetable Soup – Keto – All Day I Dream About Food for even more keto twists. Grab your spoon, toss some sausage in the pot, and make a batch—you’ll be glowing from the inside out.

Keto Italian Sausage Soup

A rich and creamy keto Italian sausage soup perfect for cold days, packed with flavor and low on carbs.
Prep Time 10 minutes
Cook Time 30 minutes
Total Time 40 minutes
Course Main Course, Soup
Cuisine Italian
Servings 6 servings
Calories 420 kcal

Ingredients
  

For the soup

  • 1 lb Italian sausage Spicy or sweet according to preference
  • 1 onion, diced For flavor base
  • 3 cloves garlic, minced Add for additional flavor
  • 4 cups chicken broth Add gradually to control creaminess
  • 1 cup heavy cream Can substitute with coconut cream for dairy-free
  • 2 cups kale or spinach, chopped Add just before serving for color and nutrition
  • 1 tsp red pepper flakes Adjust based on spiciness preference
  • Salt to taste Salt Season to preference

Instructions
 

Preparation

  • In a large pot, brown the Italian sausage over medium heat.
  • Add in diced onion and garlic, cooking until softened.

Cooking

  • Gradually stir in chicken broth and let it simmer.
  • Slowly add the heavy cream, stirring continuously to avoid curdling.
  • In the last few minutes, incorporate the chopped kale or spinach.
  • Season with salt and red pepper flakes to taste.

Serving

  • Let the soup sit for a few minutes before serving to thicken and enhance flavors.
  • Serve hot with optional Parmesan chips or keto garlic bread.

Notes

This soup freezes well; store cooled soup in zip bags or containers. For dairy-free options, use coconut cream. Can substitute sausage types for varying flavors.
Keyword Comfort Food, Italian Sausage Soup, Keto Soup, Low Carb Soup, Winter Recipes

Delicious Gluten-Free Keto Pumpkin Pie Your Taste Buds Will Love!

gluten-free keto pumpkin pie is hands down the trickiest fall treat to master. Everyone wants that classic pumpkin pie taste, but the moment you mention “keto” and “gluten-free,” people back away awkwardly (trust me, even my own family). If you’ve ever found yourself wishing you could just eat a slice without breaking out in a carb sweat, you’re in good company. I totally get those doubts. I’ve had more kitchen fails than I care to admit. If you can nail an easy dinner like this cheesy spaghetti squash keto casserole and crave something sweet after, stick around. Or check out the full dessert keto category if you want more ideas. Anyway, let’s get to the good stuff.
gluten-free keto pumpkin pie

Key Ingredients for Keto Pumpkin Pie

Alright, before you dash to the kitchen, let’s cover the basics. For gluten-free keto pumpkin pie, you’ll need a few superstar ingredients. The crust is crucial and can absolutely make or break your pie. Almond flour is my go-to, mostly because it gives that nutty crunch without much fuss. You need some butter, eggs (yep, fresh are best), and a pinch of salt. For sweetener, I recommend sticking with erythritol or monk fruit — they both play nice with pumpkin, and won’t give you that weird aftertaste thing.

Now, as for filling, grab a can of pure pumpkin puree (not pumpkin pie filling, yikes, the sugar in that!). Then you’re gonna want some heavy cream or coconut cream if you want dairy-free. Warm spices like cinnamon, ginger, nutmeg, and cloves? Absolutely. Don’t be shy with them, either. A little vanilla extract goes a long way. It’s basically autumn in a bowl.

If you’re the type who likes to swap things out, you can use pecan or coconut flour instead of almond. I sometimes throw in a shake of pumpkin pie spice, just depending on my mood. It isn’t rocket science, but you need the basics to start.
gluten-free keto pumpkin pie

Step-by-Step Instructions for Making Keto Pumpkin Pie

This is where it can get a little wild. So, follow me here. First up: preheat the oven. Have you ever forgotten that? Happens way too often to me, so set it before you do anything.

Get your almond flour, melted butter, a beaten egg, your sweetener, and salt together. Mix them up good. Don’t overthink it – just get everything combined till crumbly. It should look a little rough, not totally perfect. Press it out in a pie plate, but don’t stress about edges being Pinterest-level beautiful (mine are always kind of lopsided).

Bake that crust for about 10 minutes. You want it barely golden, not brown. Meanwhile, you’ll whisk up your pumpkin puree, eggs, heavy cream (or coconut cream), your favorite keto-friendly sweetener, vanilla, cinnamon, and any other spices you’re feeling. Pour that right in the shell.

Then pop it in the oven, usually 40–50 minutes. I’d check at 40. My oven is moody, yours might be too. It should be set but a little jiggly in the middle.

Allow it to cool completely (my big weakness, I always want to cut in early – it falls apart if you do). Pop in the fridge for at least 2 hours. Alright, that’s it. Simple enough, but every step really matters.

I tried making this keto pumpkin pie for Thanksgiving and even my skeptical brother loved it. The crust was just the right amount of crisp and the filling had that perfect “real pie” feel. – Amanda, Dallas

Delicious Gluten-Free Keto Pumpkin Pie Your Taste Buds Will Love!

Tips for Perfecting Your Pumpkin Pie

Okay, some practical secrets. If your almond flour is super coarse, blend it up a bit for a finer texture. Trust me, it makes the crust hold together better and gives a lighter bite.

Don’t under-sweeten. Keto sweeteners can sometimes taste less sweet after baking, so always taste your filling mixture before you pour it in the crust. Adjust on the fly.

Always line the bottom of your pie pan with parchment paper. Nightmare scenario? Pie stuck so bad you have to eat it with a spoon straight from the tin (and while some people might call that “rustic,” it’s just a mess).

If you want a super glossy pie (looks like five-star restaurant stuff), brush a little melted butter on the filling in the last ten minutes. Magic, I swear.

Lastly, don’t skip cooling time. Gooey pie is annoying to cut and really does not look nice on a plate. Learned that one the hard way.

Variations: Making it Dairy-Free and Vegan

Lots of folks ask about a dairy-free or even vegan version of this gluten-free keto pumpkin pie. And the answer is… yes, you can totally do it. Coconut cream is your hero here. It gives that same creamy vibe you get from heavy cream, but keeps it dairy-free.

For the crust, swap the butter for coconut oil. Some people even use plant-based “butter,” but I like coconut oil for the flavor. To make it vegan, you’ll need to use a flax egg instead of real eggs. It’s not quite the same, but it’ll get you close without totally wrecking the pie structure. Sometimes, if I’m making this for company, I’ll double down on the vanilla and spices so nobody notices the tweaks.

Side note – not all sweeteners are vegan. If that’s important for you, check the labels. It can be tricky, but most brands are getting better about marking clearly.

Honestly, the coconut flavor makes it kind of special. If you’re not coconut-crazy, almond milk with dissolved gelatin works too (not vegan, but dairy-free). Play around. Recipes are a guideline, not a prison.

Serving Suggestions

  • Dust with extra cinnamon, or a tiny bit of powdered keto sweetener, if you like it fancy.
  • Pair a slice with a mug of coffee or hot chai on a chilly evening. My absolute favorite.
  • A small dollop of homemade whipped cream (or coconut whip), and suddenly it’s holiday-special.
  • Try a slice paired with air fryer spaghetti squash for a surprisingly satisfying meal combo.

Common Questions About Gluten-Free Pumpkin Pie

Can I freeze this gluten-free keto pumpkin pie?
You can! Just wrap tightly, freeze, then thaw overnight in the fridge.

Do I have to use almond flour for the crust?
Nope. Coconut flour or a blend works. But the texture will shift a bit. Still good, though.

What if my pie cracks on top?
Don’t freak out. It happens. Cover it with whipped cream or a sprinkle of cinnamon and pretend it never happened.

Is canned pumpkin okay, or should I use fresh?
Honestly, canned is just easier and works perfectly. If you’re feeling fancy, roast your own, but I usually don’t bother.

Can I make this ahead?
Absolutely. It tastes even better the next day and slices way easier.

Go Bake the Best Pie of Your Keto Life!

Alright, let’s be real. gluten-free keto pumpkin pie can sound a bit intimidating, but with some basics and a dash of persistence, you’ll totally crush it. The key is good ingredients, patience, and a willingness to eat even the less-than-perfect slices. If you’re ready to tackle more savory meals, check out this keto meat pie or explore keto dinners that will keep everyone full. Some of my favorite resources for pumpkin pie perfection include this Best Keto Pumpkin Pie from gnom-gnom and also Keto Pumpkin Pie on Plating Pixels. What are you waiting for? Your kitchen awaits, and so does that pie!

Keto Pumpkin Pie

A delicious gluten-free and keto-friendly pumpkin pie that captures the essence of fall with its rich spices and creamy texture.
Prep Time 20 minutes
Cook Time 1 hour
Total Time 1 hour 20 minutes
Course Dessert, Pie
Cuisine American
Servings 8 servings
Calories 180 kcal

Ingredients
  

For the crust

  • 2 cups Almond flour A nutty base for the crust.
  • ½ cup Butter, melted
  • 1 large Egg, beaten Fresh eggs are best.
  • ¼ teaspoon Salt
  • ¼ cup Keto sweetener (erythritol or monk fruit) Adjust sweetness as needed.

For the filling

  • 1 can Pure pumpkin puree Do not use pumpkin pie filling.
  • 2 large Eggs
  • ½ cup Heavy cream or coconut cream for dairy-free Coconut cream maintains a creamy texture.
  • 1 teaspoon Vanilla extract
  • 1 teaspoon Cinnamon
  • ½ teaspoon Ginger
  • ½ teaspoon Nutmeg
  • ¼ teaspoon Cloves

Instructions
 

Preparation

  • Preheat your oven to 350°F (175°C).
  • In a mixing bowl, combine almond flour, melted butter, beaten egg, sweetener, and salt. Mix until crumbly.
  • Press the mixture into a pie plate, ensuring even coverage.
  • Bake the crust for about 10 minutes until barely golden, then set aside.

Filling Preparation and Baking

  • In another bowl, whisk together pumpkin puree, eggs, heavy cream (or coconut cream), sweetener, vanilla, and spices.
  • Pour the filling into the baked crust.
  • Bake for 40-50 minutes, checking at 40 minutes. The filling should be set but slightly jiggly in the middle.
  • Allow the pie to cool completely and refrigerate for at least 2 hours before serving.

Notes

Use parchment paper at the bottom of the pie pan for easy removal. Adjust sweetness according to taste before pouring the filling. A little melted butter brushed on top before the end of baking adds shine.
Keyword Dairy-Free Options, Fall Dessert, Gluten-Free Dessert, Keto Pumpkin Pie, Low-Carb Pumpkin Pie

Delicious Keto Chicken Casserole for Cozy Nights

keto chicken casserole is my go-to when the rain’s beating on the window and I’ve reached peak laziness. Sound familiar? Sometimes you want cozy, easy, and not another takeout container. Or maybe you just need something hearty, but, you know, low carb actually. I’ve fiddled with so many versions, but honestly, once I found this method, I never looked back. Need more inspiration? Take a peek at this easy keto chicken casserole recipe—trust me, it’s another comfort classic.
Delicious Keto Chicken Casserole for Cozy Nights

Cheesy Keto Chicken Bake!!!

Let’s just jump in here—cheese is basically what makes this whole thing magic. The kind of rich, bubbly melty mess you want to scoop straight from the dish (just watch your tongue, been there, ouch). For this keto chicken casserole, I always start with leftover chicken or rotisserie because it’s just one less headache. Shred it up. Then comes a heap of shredded cheddar, plus a little cream cheese for extra creaminess. Every time, my house smells like a five-star restaurant by the time it’s bubbling.

The blend is up to you, honestly. Sometimes I use mozzarella if I’m feeling cheesy in a mellow way, or pepper jack for a kick. I’ll tell you though, I tried making it with just store-bought bag cheese and… not as gooey. If you can shred yours, do it. Throw in some frozen broccoli or cauliflower florets if you’ve got picky teens to feed. I mean, it’s a stealth veggie bomb wrapped in cheese, so nobody ever complains. Bake till golden on the corners—folks, that’s your crispy jackpot.

I never thought I could eat casseroles on a low carb diet! This recipe nailed it—cheesy, rich, and pure comfort. Loved how easy it was. — Anna S.

keto chicken casserole

How to avoid a soup?

Honestly, no one wants soggy, liquid-y casserole. There, I said it. It’s happened to me (embarrassingly recently), so let’s just talk about keeping your keto chicken casserole from becoming a soup.

A few basic moves can save dinner. First, always pat dry your cooked chicken. Extra moisture is usually the culprit and can sneak in from frozen veggies too. Oh, and if you use frozen broccoli, zap it in the microwave and squeeze out as much liquid as humanly possible. Your cheese should be room temperature before mixing, so it doesn’t create watery pockets.

Also, don’t overload on the cream cheese or broth—“creamy” is good, “swimming” is not. If the mixture seems loose before baking, toss in a spoonful of almond flour or a little grated parm to soak up any excess. And always bake uncovered so the steam has somewhere to go, otherwise, it’ll all just… stay there. Learned that the hard way.

Delicious Keto Chicken Casserole for Cozy Nights

Variations

No two weeks are the same at my house, so neither is my keto chicken casserole. Got leftover veggies from taco night? In they go. Need something with a different vibe? Swap seasoning.

Sometimes I add crumbled bacon and swap half the cheddar for smoked gouda. Total show-off move, but wow. When I want Tex-Mex flavors, taco seasoning and salsa verde do the trick. Even a splash of buffalo sauce and blue cheese, for you wild types out there.

If you get bored of chicken, try turkey (turkey’s just diet chicken, anyway), or even toss in some pulled pork if there’s any available. As for veggies, mushrooms and spinach pair great too. See? This is a casserole for the people. Tinker with it.

Recipe Tip

Here’s a tiny detail I ignored for ages—let your keto chicken casserole rest for 5-10 minutes after pulling it from the oven. The cheese sets up, and honestly, it’ll save your mouth from third-degree burns.

If you want that golden, bubbly top (and who doesn’t), pop it under the broiler for two minutes at the end. Watch it like a hawk though—burnt cheese drama is real.

Also, prepping everything ahead makes weeknights a breeze. I assemble the casserole the night before, stash it in the fridge, then bake after work. Feels like cheating, but in a good way.

Serving Suggestions

Let’s be real, this dish is a meal on its own. Still, sometimes sides make it even better:

  • Serve with a big, leafy salad to keep things light-ish.
  • Craving crunch? Sprinkle fresh green onions or crispy bacon bits on top.
  • Garlic roasted asparagus, or even simple steamed broccoli, balances the richness.
  • If you want to get extra cozy, a cup of keto-friendly soup before diving in keeps everyone happy.

And, if you want more low carb dinner ideas for the fam, you’ll love this keto chicken broccoli casserole for a twist.

Common Questions

How long does keto chicken casserole last in the fridge?
Usually three to four days. Any longer and it gets weird, you know?

Can I freeze leftovers?
Yep, just wrap tightly and label it. It reheats best in the oven, not the microwave.

Do I have to use rotisserie chicken?
Nope! Any cooked chicken—baked, grilled, boiled—works fine. Rotisserie just speeds things up.

Is this recipe spicy?
Not at all, unless you add spicy cheese or hot sauce. Then, totally up to your taste buds.

Can I double the recipe for a crowd?
Absolutely. Use a bigger dish and add a few minutes to the bake time if needed.

Bring On the Cozy Nights (You Deserve It)

So that’s pretty much my playbook for making keto chicken casserole a weeknight hero. There’s no secret handshake. Just a little cheese, love, and not overthinking it. For even more ways to keep dinner low carb and totally comforting, don’t skip over this Keto Chicken Casserole from Headbanger’s Kitchen or check out a really comforting Cheesy Keto Chicken Casserole with great reviews. If you’re broccoli obsessed, you gotta see what All Day I Dream About Food has got going on too.

Go ahead and give it a try. I bet you’ll end up wanting seconds (and hey, you won’t even miss the noodles). Cozy nights in just got much, much tastier.

Cheesy Keto Chicken Casserole

A comforting, cheesy casserole made with shredded chicken, cream cheese, and cheddar, perfect for low carb diets.
Prep Time 15 minutes
Cook Time 30 minutes
Total Time 45 minutes
Course Dinner, Main Course
Cuisine American, Keto
Servings 6 servings
Calories 400 kcal

Ingredients
  

Main Ingredients

  • 4 cups shredded cooked chicken Use leftover or rotisserie chicken.
  • 2 cups shredded cheddar cheese Shred your own for best results.
  • 4 oz cream cheese Softened to room temperature.
  • 1 cup broccoli florets Can use frozen, just pat dry.

Optional Add-Ins

  • 1 cup crumbled bacon Add for extra flavor.
  • 1 cup smoked gouda cheese Can replace half of the cheddar.
  • 1 tbsp taco seasoning For a Tex-Mex flavor.
  • 1 tbsp buffalo sauce For heat, optional.

Instructions
 

Preparation

  • Preheat your oven to 350°F (175°C).
  • In a large bowl, combine shredded chicken, cheddar cheese, cream cheese, and broccoli florets.
  • Mix until well combined, ensuring the cheese is evenly distributed.

Baking

  • Transfer the mixture to a baking dish and spread it evenly.
  • Bake uncovered for 30 minutes or until the top is golden and bubbly.
  • Optionally, broil for 2 minutes at the end for an extra crispy top.

Serving

  • Let the casserole rest for 5-10 minutes before serving.
  • Serve warm. Can be accompanied with a salad or topped with green onions.

Notes

Always pat dry cooked chicken to avoid excess moisture. Prepping ahead makes weeknight dinners easy. Leftovers can be stored in the fridge for 3-4 days or frozen.
Keyword Cheesy Bake, Comfort Food, Easy Dinner, Keto Chicken Casserole, Low Carb